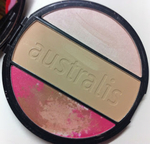
 So I often get asked how I contour and highlight, so I thought I would begin with explaining how I highlight and my favourite highlight! My favourite highlight is the actually in a face kit I have from Australis. It is called the Face-a-holic Touch and Go and comes with a blush, pressed powder and highlighter. This highlight is a champagne colour and is highly pigmented. It is buttery soft and blends out so beautifully. This set is really reasonably priced and each product is amazing. To use the highlight I begin by apply my base and contour, I then get a soft fluffy brush and get a small amount of product on the edge. I then apply this just above/on top of my cheek bone really lightly. I find with highlight it's easy to be too heavy handed with it so go soft! I then get my fluffy powder blush and blend it out. I also apply a little bit on my Cupid's bow using the tip of my finger. This highlight is also perfect for using on the brow bone, down the nose and in the inner corner of the eyes. Just make sure you blend out and don't apply to heavy! A highlight should only be a light shimmer not a heavy stripe. It should be so light that it's not obvious when looking but the in the light you should be able to see a soft shimmer that lifts the check bones and defines the faces natural bone structure. In the pictures below the first is the before where my skin is looking quite matte and flat. The second you can just see how the top of my check bone a soft shimmer which in turn has left me a slightly more defined check bone. Let me know how and where you apply you highlight and stay tuned for the contour how to. Nicole xx 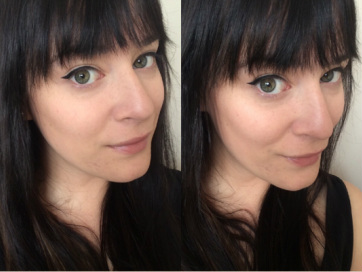
0 Comments
For the second Top 5 I wanted to do something non beauty related. I've recently been growing my DVD collection so I thought I would share my Top 5 Movies! 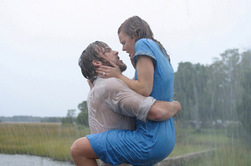 These are in no particular order but he first one I'll talk about is The Notebook. Ryan Gosling. I don't have to continue but I will! This movie is the sweetest love story and I love the way the movie is filmed. It's beautiful and tasteful and tells the story perfectly. Ryan Gosling is the perfect Noah and Rachel McAdams is the perfect Allie. If you haven't seen this movie I highly recommend it..but don't forget a box of tissues!! This movie is also based on a book by Nicholas Sparks which is amazing so if you don't want to watch the movie definitely read the book!  One of my all time favourites is The Lion King. I've loved this since childhood and everytime I watch it (even as an adult) I still absolutely love it. Incase you haven't seen it it's basically about a lion pride that's leader is killed by his brother, the son of the leader is lead to believe that he kills his father so runs away. It follows his journey of growing into an adult lion and all the friends he makes along the way.  A new favourite is The Great Gatsby, this movie is amazing!! The costumes, hair and make up are incredible and the actors are brilliant. It's more or less an action/drama with a love story subtly chucked in there (the love story becomes more obvious as the movie progresses!). It's about a man who falls in love with a woman but they basically fall out of touch for different reasons. She meets another man and marries, it then follows Gatsbys journey to trying to win her back. Even though it's based around a love story it isn't the main focus of the film (for the most part) so men and women will love this movie.  A movie I absolutely love in the first Sex and the City Movie. I love the series so the movie was just an extension of that! If you haven't seen the series, SATC is about four woman who are best friends living in New York who are going through life (and men!) and it pretty much just follows their journeys from single woman to married with children. This movie is so funny and has some really sad parts too. The fashion, hair and make up is phenomenal so if you love everything fashion then this alone would be a great reason to watch.  Lastly is The Hunger Games, this is a newer favourite as well but I just love the concept of these movies. The story basically is that all the poor people love in districts..the rich live in the capital. Each year a boy and girl from each district is chosen to pretty much fight against children from all the other districts until only one survives. This may sound terrible but it's a really good movie! It follows one girls journey through it all and how she survives it. This movie has a bit of action, blood an guts and of course a love story.
There is my Top 5 movies for the mean while! If you have any recommendations for me please just pop them below Nicole xx Today I thought I would do a review of the moisturiser I am using, this is the Elizabeth Arden Visible Difference for Combination Skin. I've been using this cream for a few months and have been really happy with it so I though I would let you all know exactly what I think about it. 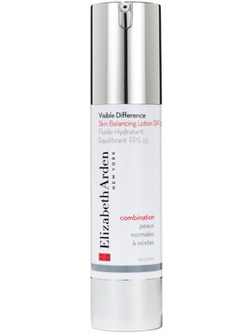 I first tried this range when I got a sample of the scrub and moisturiser from Farmers. I managed to use the little foil packet three times and really loved it. Since buying the full size moisturiser I've noticed great results with my skin, it's much softer and I find it's always hydrated without feeling greasy. It's light enough for me to put on before my primer and moisturising enough for me to apply at night after I take my make up off. It also smells amazing without being too over powering. To sum it up this moisturiser is amazing. For the amount of time a bottle lasts it's definitely value for money. It also comes in a formula for dry skin, normal skin and oily skin so there's an option for everyone. I've just purchased a kit that has the full skin care range so I'm interested to see what changes this will bring to my skin!
Nicole xx 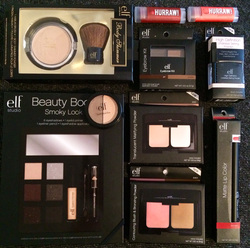 So late last week I ordered some ELF make up off an online website. I requested the faster shipping (as the cost wasn't too different from the slowest form of shipping) and was surprised when it showed up only 5 days later. I ended up getting 10 items for just under $40.00 and these were all products I have been dying to try for a long time so I've been pretty excited!! The products came really well packaged with not a single product damaged. I got a little excited when it first came (and before I'd had a chance to photograph it all!!) so please ignore any marks in the products, they all came smooth and clean. I am looking so forward to trying it all and reviewing it on here...but so far I am well impressed. 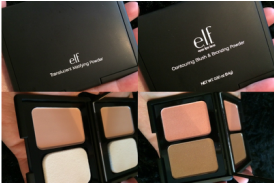 The first thing I opened was the Translucent Matifying Powder in Translucent. This is just a basic setting powder that is supposed to give a flawless matte finish. It comes in a sleek compact with the powder to one side and a small sponge to the other. It feels soft and silky and is a great colour. I got the Contouring Blush and Bronzing Powder in St Lucia, this I've heard it a great dupe for the Nars Laguna and Orgasm Duo so I can not wait to try this. The bronzer looks like its got a small amount of gold shimmer in it but when swatched it looks matte. It's a great golden tone too, not too orange. The blush is a soft peachy pink with a small amount of gold shimmer which does show up when swatched but not too strongly. Just a nice soft everyday blush. 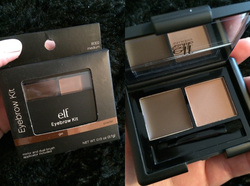 I got the extremely popular Eyebrow kit that Youtuber Shaaanxo uses all the time (which is the reason why it has become so popular) I got it in the shade Medium and in the pan it looks quite light but when swatched it looks like it'll be a great colour. In the pan it has a setting gel, which is the dark brown side and the eyebrow powder. The gel looks really dark but is quite a sheer colour and will add a small amount of tint when used. It also comes with a small brush that has a fluffy end and a tapered end. The fluffy end doesn't look practical at all but the tapered end looks quite useable. 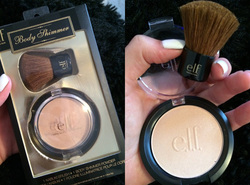 I've been after a Kabuki brush for a while and I saw this little kit, a kabuki brush on its own was double the price so I thought I'd give the kit a go. This kit comes with a Healthy Glow Shimmer Powder and the brush. The shimmer is actually a gorgeous golden shimmer with small sand gold and copper looking flecks. This blends out really well and looks like it would be a great highlight. The brush however is tiny, I should have realized this before I got it but I still think i can make it work. Its perfectly dense and extremely soft so would be good for setting under eye powder if not the whole face. 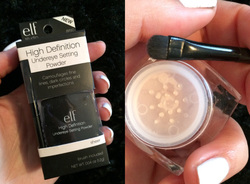 I got another product made popular by Youtuber Shaaanxo, this is the HD Undereye Setting Powder in Sheer. This product claims to camouflage fine lines, dark circles and imperfections, and is supposed to be perfect for setting cream concealer. The packaging is very sleek and light weight and the powder is self feels soft and silky. There is a pretty good amount of product too considering the amount you actually need to use. It also comes with a brush which is more like an eyeshadow brush and quite stiff. This wouldn't be ideal for the setting powder but could work for a concealer brush or an eyeshadow brush. 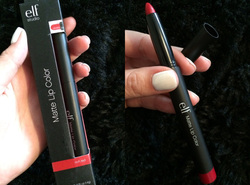 Next is probably my favourite product! This is the Matte Lip Colour in Rich Red, I've been after a good red matte lip product for a while and this is gorgeous. It comes in pen form and is a simple wind up. There is actually a good amount of product there too which is surprising. The colour is a deep red which doesn't lean too much toward being blue based or orange based so would be easy to wear on most skin tones. I did swatch this on the back of my hand and its creamy and soft and extremely pigmented. I can't wait to try this on my lips and see what its staying power is like. I've got a feeling I'm going to love it!  Next is an Eyeshadow Duo in Butter Pecan. The container for this is really sturdy and I think it will be great for travelling. The two colours are a soft champagne and what looks like a mid toned brown, they are also both shimmer. When swatched the champagne colour is gorgeous and looks just like it does in the pan, a perfect all over colour. The brown however is much different, it swatched almost like a copper brown. This colour is AMAZING and will be perfect on blue or green eyes. It has a nice amount of shimmer and I think it would be good for day and night. 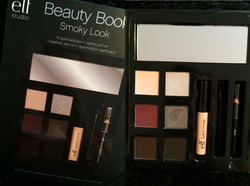 The last thing I'm going to talk about is the Beauty Book in Smoky Look. As the name would suggest this product comes in a book form and is actually great value for the price (around $5.00) on the inside it has a little instruction guide on how to create a day and night look. The book comes with 6 eyeshadows, 3 matte day shades and 3 shimmer evening shades. It also comes with an eyeshadow primer, a Black eyeliner and a brush. This set comes with a great selection of colours, however some of the shimmers and quite chalky but nothing that can't be fixed with a little primer. All in all this is a great little kit and I'm sure I'll get plenty of use out of it.
I also got two Hurraw Lip Balms but I am going to do a seperate blog post about them and review them on their own, so keep an eye out for that! These products are all really great value for the price, they are the perfect beginner products and so far I'm really liking what I've got. I also have a discount code so if anyone wants to make an order just comment below and I'll give it to you. Nicole xx I am going to start reviewing some of the new products that I am buying as well as doing Make Up Hauls on here. I have been on the hunt lately for a new under eye concealer as my current one has Acne healing properties in it and I just think that is too harsh for the under eye area. Enter Loreal Magic Lumi!! 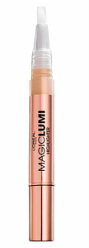 So this Concealer is supposed to be more a highlight and light concealer combo and for this reason I think it works really well on the under eye area. It is a light formula and barely detectable on the skin. It comes in a gorgeous Rose Gold looking pen and all you have to do is twist the bottom and the product comes up through the little brush at the top, I then go and blend out with my fingers as I like the soft result this gives. When I first used it I literally had to pump it like twenty times to get it started but I now find that around five pumps will do both under eye areas. This concealer comes in a variety of shades and I have mine in light, I find that if I go a shade lighter with my concealer it really highlights and brightens my under eye area. I originally went to buy this product instore but found it was around $30.00 (NZ make up products are insanely priced!!) but with a little research I managed to find it on another NZ website for $11.95. I like the formula and texture and I find it wears really well throughout the day. I did try it on blemishes and found it didn't really provide enough coverage, so I wouldn't recommend it for that. I think for women who are only dealing with a small amount of fine lines this is perfect as it didn't fall into my lines at all, I do set it immediately with a setting powder though so either way I am avoiding the creasing problem. I've seen a few negative reviews on this product and I can't work out why. This product does everything it claims to do so you can't really expect much more! I have attached a photo of me wearing it below so you can get an idea of just how flawless it is. I also have some great reviews coming up including MAC Lipsticks and Foundation, a wide range of ELF make up, Hurraw Lip Balms and some Elizabeth Arden skin care so keep an eye out for all that! Nicole xx 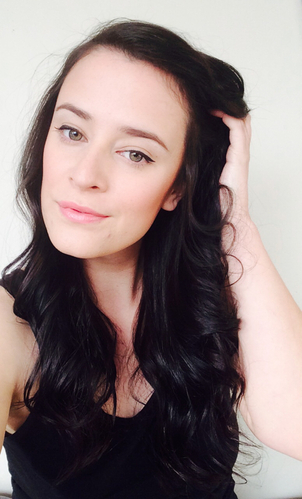
I love a good DIY...love, love, love it!! So each month I am going to blog about a DIY I am doing. For this month it is going to be a Home Decor project. I want to make our home feel...more homely so I have started to decorate! 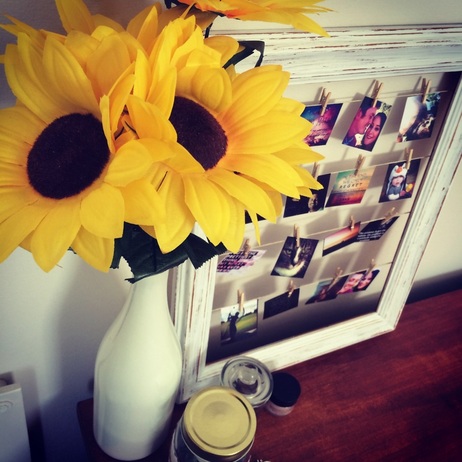 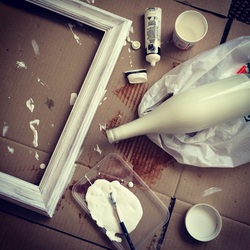 So there is two mini DIY's which I think look amazing together and use some of the same materials For the Frame you will need: - A wooden Frame - Acrylic paint (I went for white but any colour will do - Twine - Mini Pegs (I went for natural wood ones) - Small photos/pictures, I gathered mine from my Instagram account and put them all into a word document and printed them like that, I used 16 pictures - Paintbrushes - Sandpaper 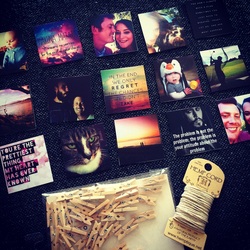 So to begin I cleaned my wooden frame and removed the glass and backing. I then applied a thin layer of paint to the frame and let it dry. I then applied another layer of paint. I then left the frame overnight to dry. The next day I got my piece of sandpaper (it was about 120 grit) and rubbed lightly on all the corners until some of the wood was poking through and it had that Shabby Chic look to it. I then measured out the twine so it would be tight across the back and measured the placement of each piece of string so they would be equal distances apart (don't rush this part as it effects the end result). I then used a staple gun to attach the string to the back of the frame. Then I pegged all my pictures on and I was done! 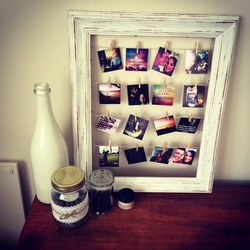 I love how this frame worked out and I get so many compliments on it. All up it cost me around $15 dollars to make and I think it looks better than something I could have brought!
For the bottle vase you will need - An empty wine bottle (I used a clear bottle but a tinted one would be fine too!) - Acrylic paint - A small bowl So I looked all over the internet to find what sort of paint would be best suitable so I could pour it into the bottle so I would still get that smooth glossy finish. I had read that the acrylic paint I already had would be ok so went ahead with that. I first mixed a small amount of water into it to get a runnier texture so it would be easier to pour into the bottle. I then poured it, a small amount at a time, into the bottle until the inside was covered. I placed it outside, upside down on a plastic lid to let it dry. This took HOURS!!! But once it was eventually dry I brought some cheap, fake sunflowers to put into it. I love how this looks and was extremely happy with the result. However with the heat we were having the paint started to run and never really set to the inside of the glass so would go streaky which I hated. I eventually ended up buying a cheap outdoor house paint in white and poured this in over top of the existing paint and so far (a month later) the paint has stayed put! I loooove to DIY and clearly am pretty happy with how my projects worked out. If there are any DIY's you would like to see just let me know in the comments Nicole xxx  So I've recently decided that I need a space to keep all my hair/make up/nail bits and pieces. Since I've recently decided that I want to also add Gel Manicures and Pedicures to the list of services I do, I thought that I should have an entire room I can do it from. I was lucky enough to be gifted a trolley, a stool, a chair, over 50 nail polishes, nail tools and a few decor bits and pieces so this got me started. But the toughest part was finding a table that was suitable. Most were either too big in generally or too wide! 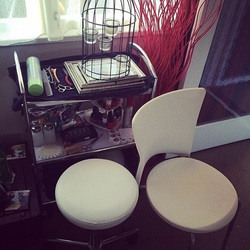 I have an obsession with DIY (which I will be doing more posts on later down the track) so I knew if I could find a cheap table I could turn it into something special. I had a colour theme in my mind as I love things to look clean and simple, so decided white would be my main colour. I wanted a 'natural' feel to the room so I decided that I would find a wooden table and shelf that I would varnish to get the look that I wanted. The only other colour I wanted to see in my room was that soft sandy gold colour that seems to be popular at the moment! I found some gorgeous photo frames that had a vintage feel to them that I thought would be perfect. 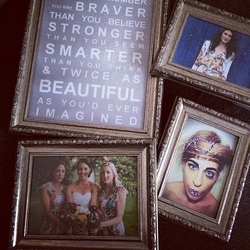 I wanted to have a few photos of some work I have done so I choose, a wedding, an Avant Garde look and a photo from a photo shoot. I also wanted something inspiration for me to look at, I ended up choosing the quote "Always remember, you are braver than you believe, stronger than you seem, smarter than you think and twice as beautiful as you'd ever imagined.' Which I think fits will with the theme of the room...and the general purpose behind the room! Now I just need to set up the rooms and find the perfect table and bookshelf!! But I'll tell you more about that in part two... Nicole xxx 
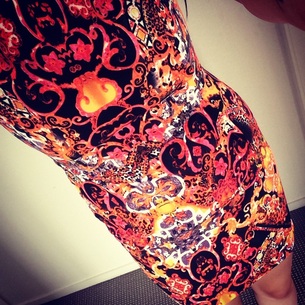 For this season my favourite colour to wear is Orange, I'm obsessed!! There has been alot of corals, orange based reds and warm tones out there for summer and I'm glad to see this trend is carrying over to Winter. There is nothing worse than wearing dull, monochrome colours for half a year!! So can everyone wear orange? It's definately not for the faint hearted!! But I do think that almost all skin tones can pull this colour off, if you are a little worried about wearing orange clothing, then start off with an orange lippy. 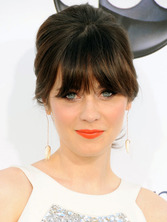 There is such a good range out there now, there's definitely a tone to suit everyone. Zooey Deschanel recently wore this gorgeous orange lip on the red carpet and I think she looks incredible! Other options would be to try some orange accessories. An orange heel will give your little black dress that pop it needs! But if your not into orange shoes, you could try handbags, jewelry or even nail polish. There is an option out there for every one, so explore this stunning pallet today Nicole xxx 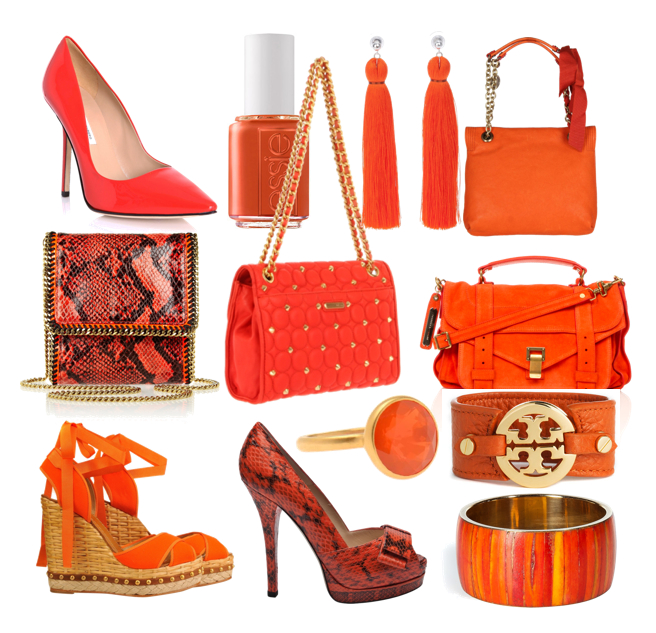 |
Fashion, Beauty and MeAn insight into the life of a Hairdresser, Make Up Artist and Fashion Junkie  Categories
All
Archives
September 2016
|
 RSS Feed
