|
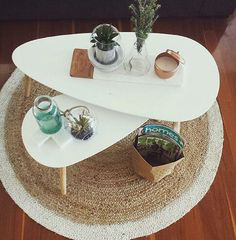
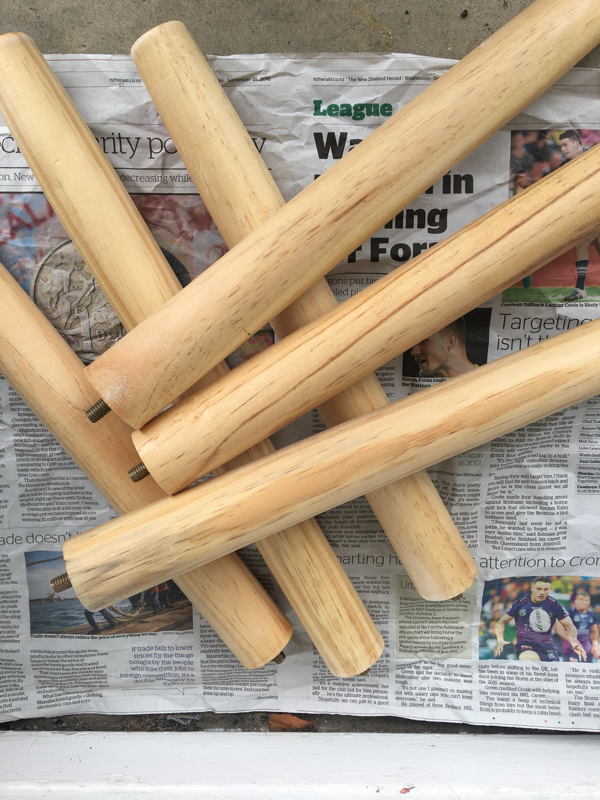
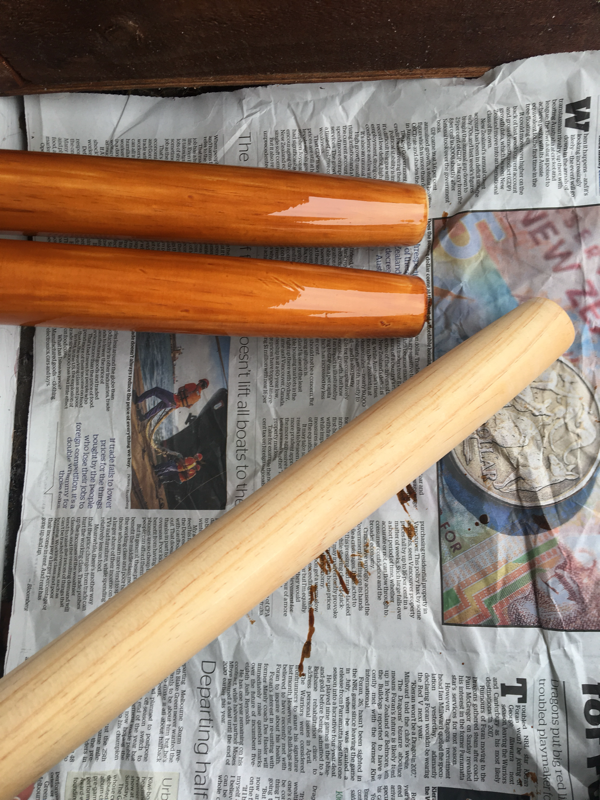
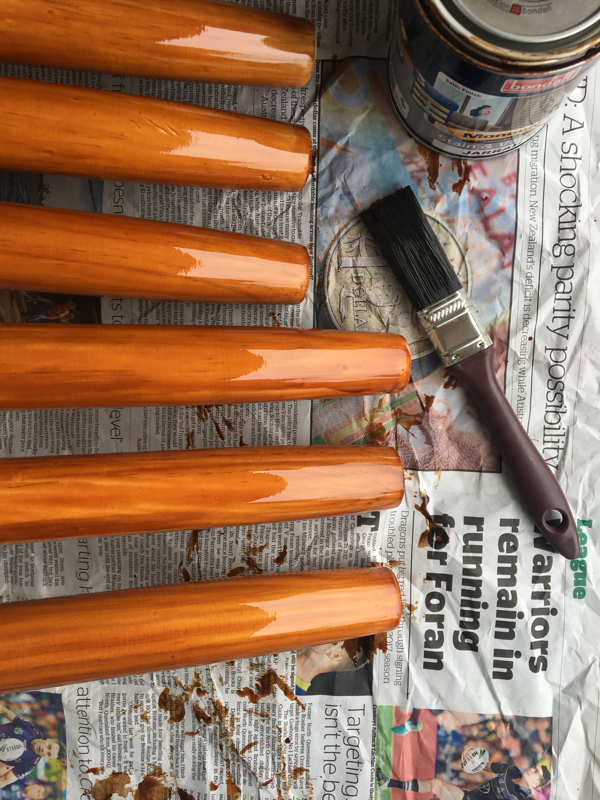
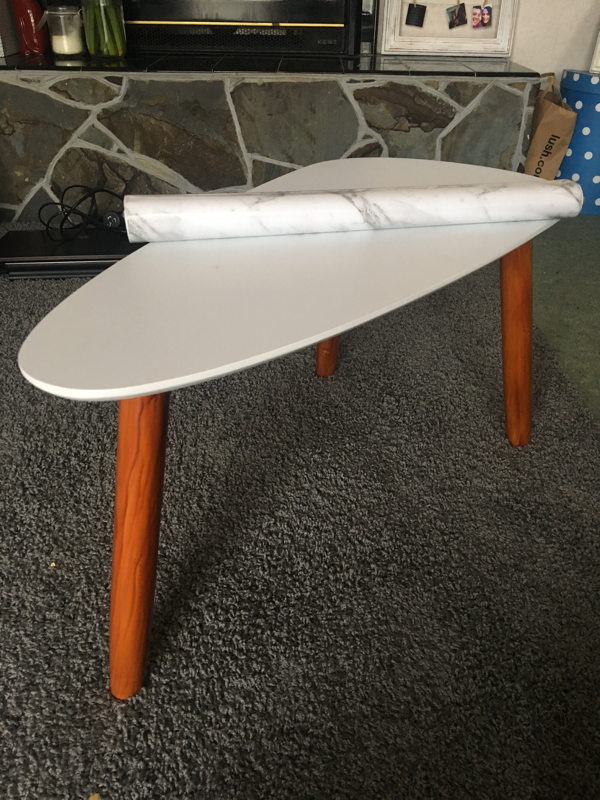
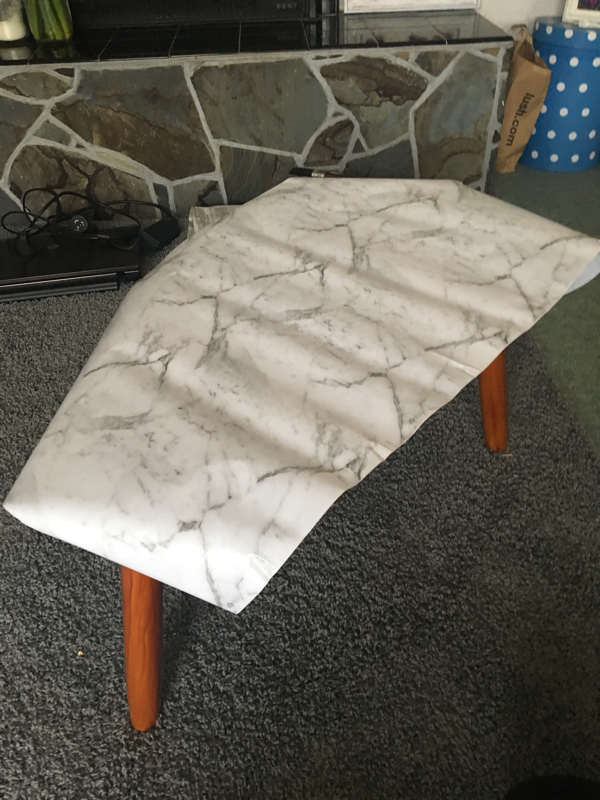
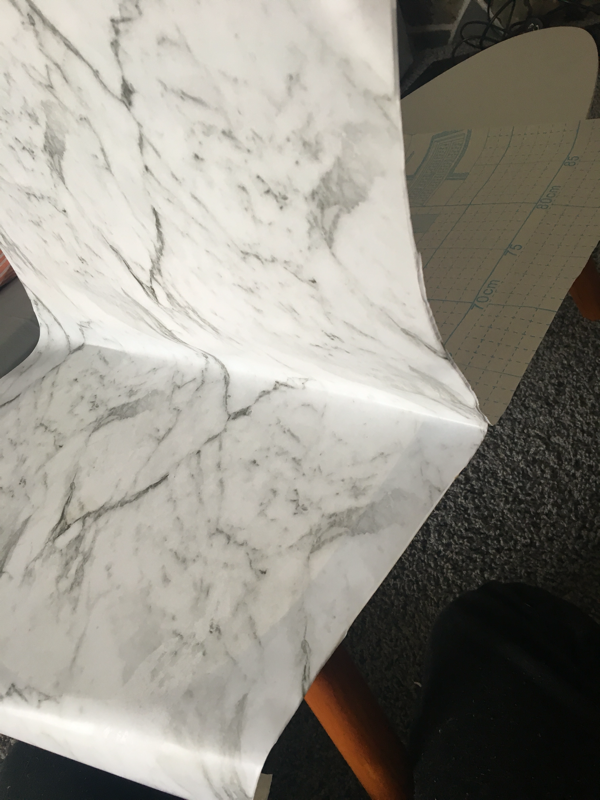
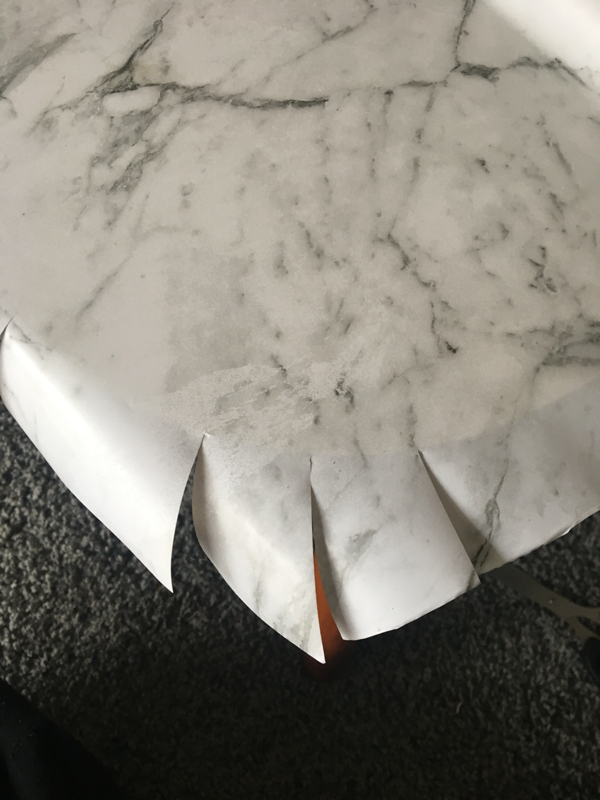
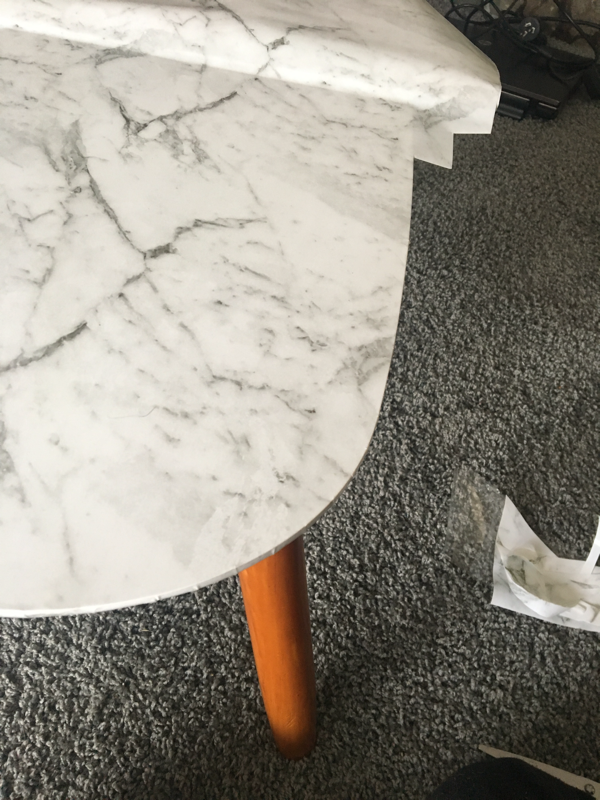
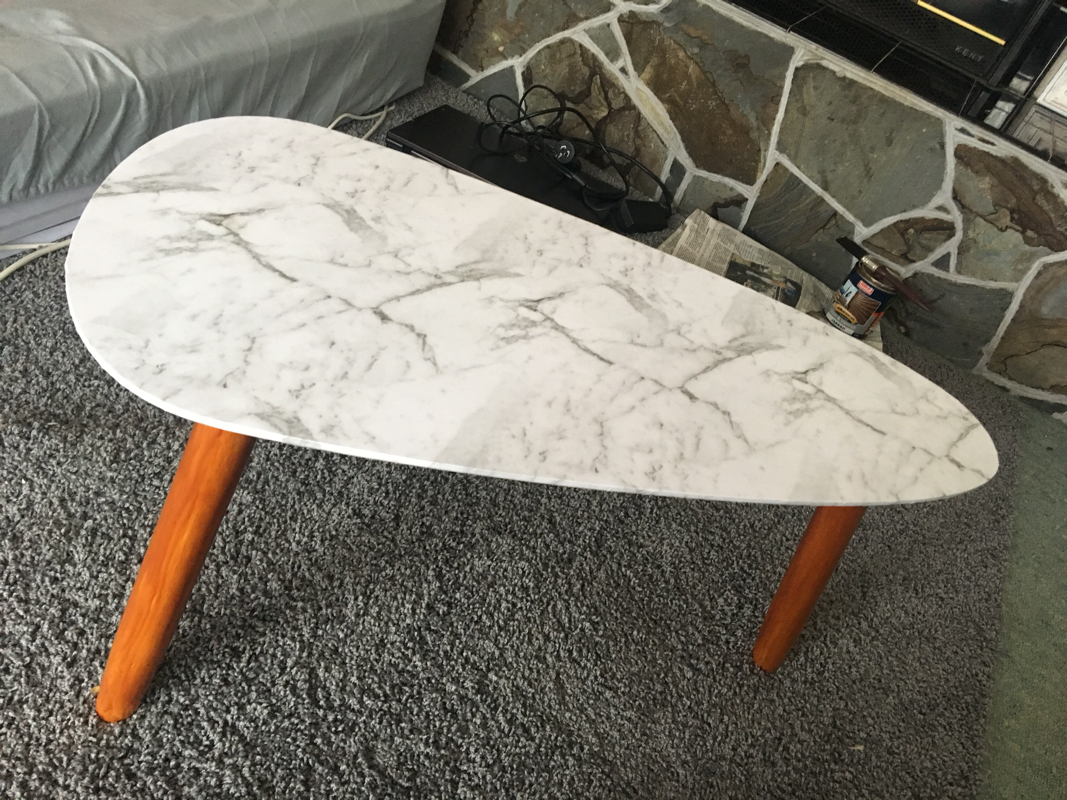
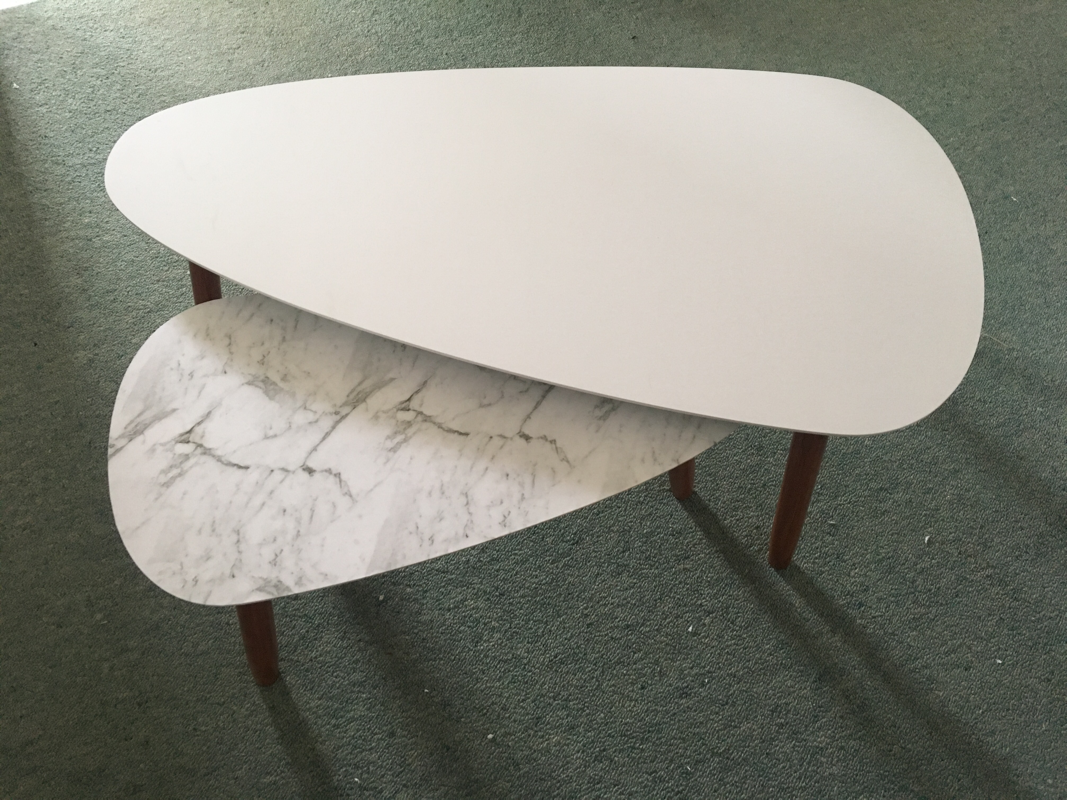
I have to say firstly, that this months DIY is my personal favourite (well so far!) I just LOVE how it turned out. Lately I have been loving doing small homeware DIY's. I love the way something so inexpensive can be made to look amazing..and at a fraction of the price it would cost for an luxury piece of furniture. 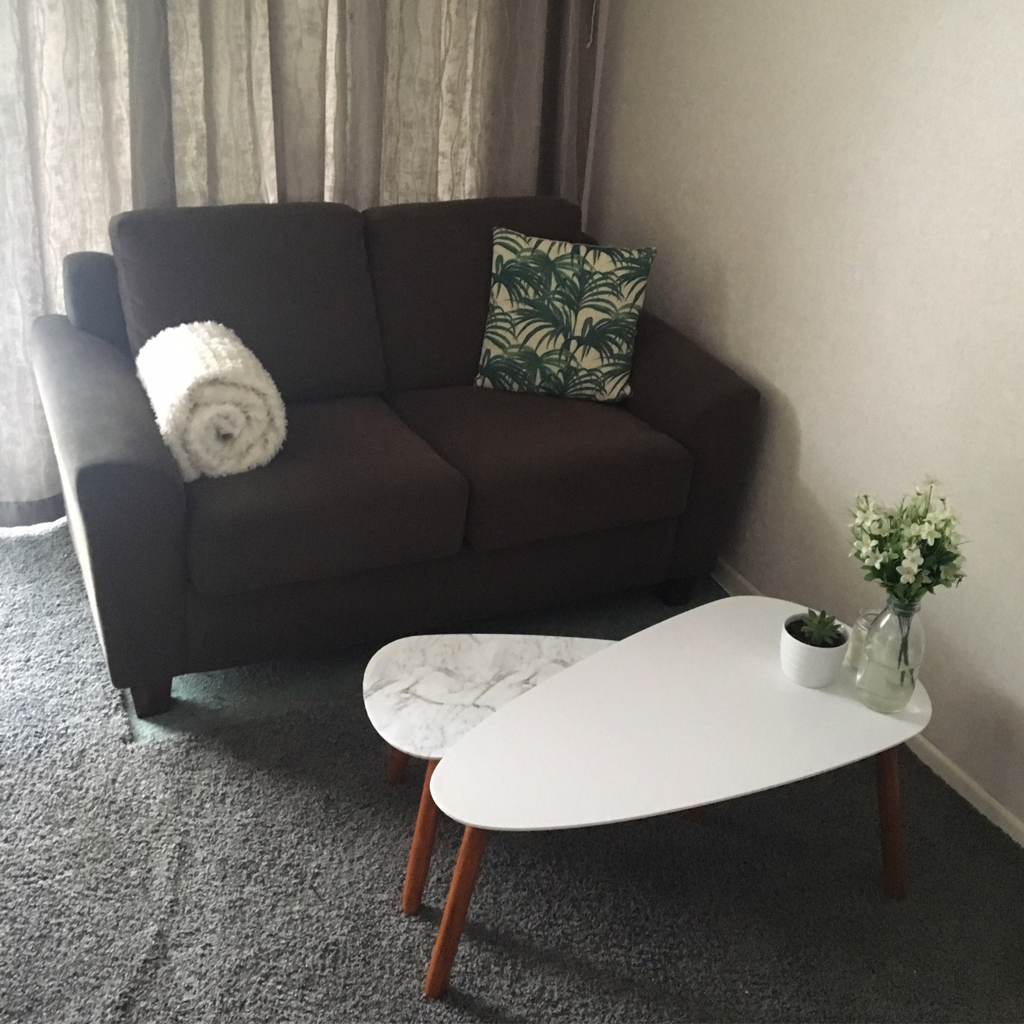 So this months DIY is my Kmart Hack coffee tables!! These inexpensive tables we're brought, as a set, from Kmart for around $40. However all of the furniture in my lounge is currently a dark varnished wood, so as much as I loved the tables..they would need to be upgraded to suit my decor. I also felt that have two white tables was a little bit much for the room, I wanted to break it up a little bit. I think the small table in the marble print is absolutely perfect. 1. Here is a before picture of the tables, I didn't take my own picture so this is one that came up on Google, it gives you a good idea of the changes made. 2. The first thing I did was sand the legs. These legs are real wood (which was what sold the set to me!) so I lightly sanded them to take off the outer coating that they put on, this also helps the varnish to adhere to the wood. 3. This photo was really just to show the drastic colour different between the varnished legs and the original legs. The varnished colour is the same colour I've used on all the furniture in my living areas..so it really does match everything perfectly! 4. Once I had finished varnishing all the legs, I let them dry 5. Next I got this gorgeous Marble Contact Paper, I picked this up from Kmart for around $6.00 and it had around 2m on it. This contact paper is amazing! It looks so realistic and it's one of the cheapest I've seen 6. Next I measured out the contact paper, I already knew the paper was wide enough so I cut enough for the length with around 5cm over hang 7. Next I slowly pealed back around 1/3 of the length of the contact paper and applied it to the table..ensuring there were no bubbles. I used a spatula to help flatten it out but you can find soft scrapers at the hardware store that would do a much better job 8. Next I cut slits around the edge of the corners of the table toward the edge of the table, so that I could wrap it under the edge as seamlessly as possible. I actually ended up having many cuts between each of these as it proved to be pretty difficult getting it flat..but you'll see a close up of that very soon! 9. Here is an up close photo of the edging, I know it's not perfect but unless you look close..I think it looks pretty good! 10. I probably should have stuck the contact paper to the table first then gone around and finished the edging..but I wasn't sure the edging would sit flat so I wanted to do a small area to test it, hence why there's a section completely done..and a section not even stuck to the table! So basically from here I went around and did what I had just done to the rest of the table. 11. Here is a close up of the table on its own, with the varnished legs back on and that gorgeous marble top! 12. And finally here are the two tables together. I think they look amazing! 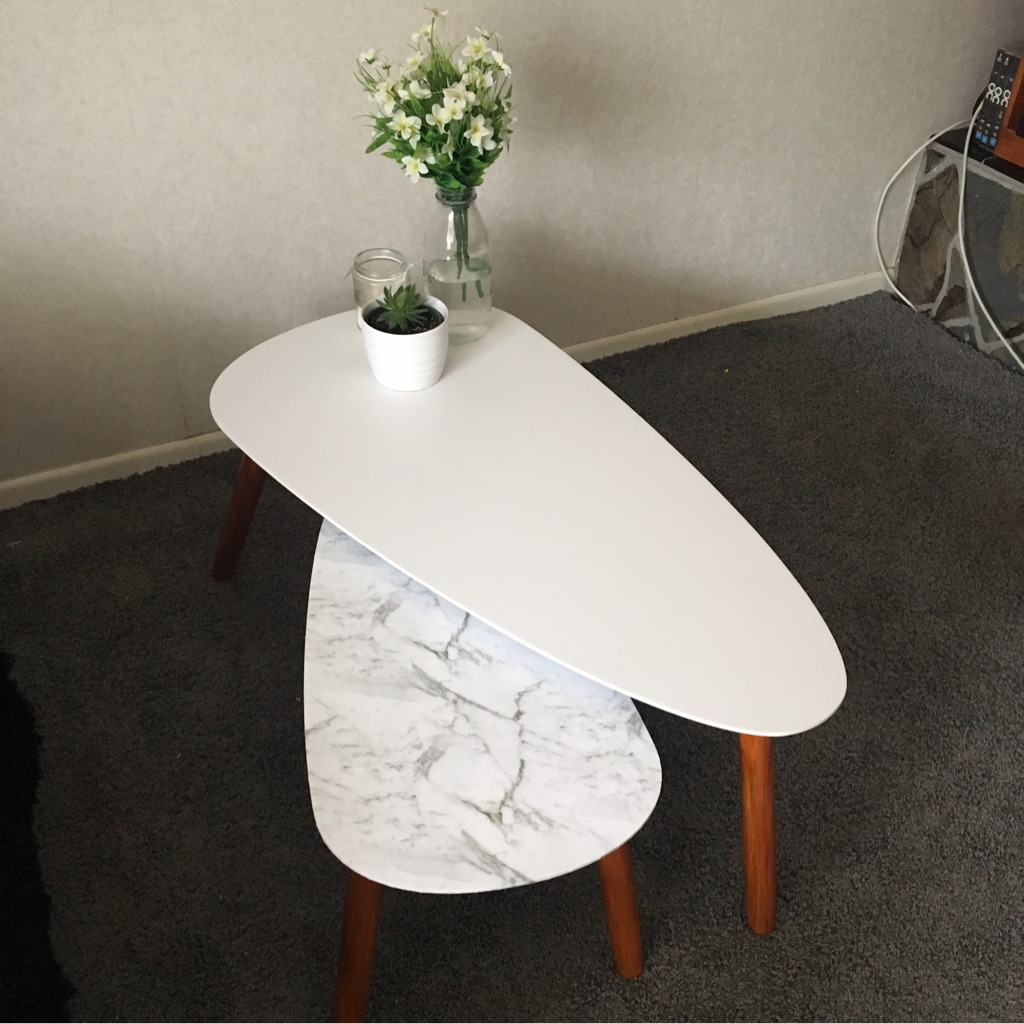 I am so happy with how these tables turned out!! I absolutely love them with a little succulent and candle on top. They are so simple but make a real statement in our living room.
I hope this has given you a little DIY inspiration, I have a couple more marble DIY's coming so keep a look out Nicole xx
0 Comments
I love a good DIY...love, love, love it!! So each month I am going to blog about a DIY I am doing. For this month it is going to be a Home Decor project. I want to make our home feel...more homely so I have started to decorate! 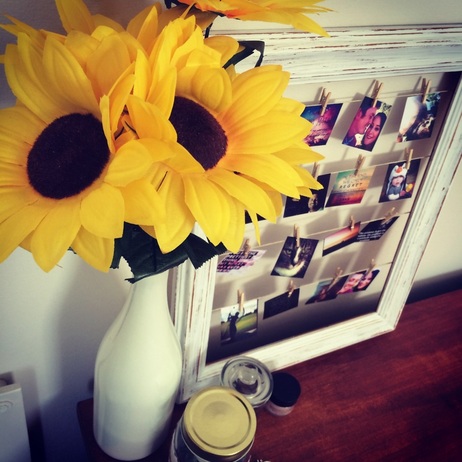 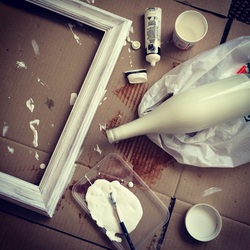 So there is two mini DIY's which I think look amazing together and use some of the same materials For the Frame you will need: - A wooden Frame - Acrylic paint (I went for white but any colour will do - Twine - Mini Pegs (I went for natural wood ones) - Small photos/pictures, I gathered mine from my Instagram account and put them all into a word document and printed them like that, I used 16 pictures - Paintbrushes - Sandpaper 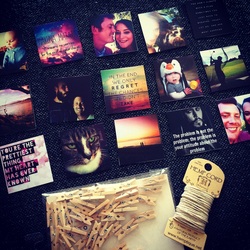 So to begin I cleaned my wooden frame and removed the glass and backing. I then applied a thin layer of paint to the frame and let it dry. I then applied another layer of paint. I then left the frame overnight to dry. The next day I got my piece of sandpaper (it was about 120 grit) and rubbed lightly on all the corners until some of the wood was poking through and it had that Shabby Chic look to it. I then measured out the twine so it would be tight across the back and measured the placement of each piece of string so they would be equal distances apart (don't rush this part as it effects the end result). I then used a staple gun to attach the string to the back of the frame. Then I pegged all my pictures on and I was done! 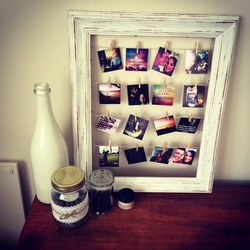 I love how this frame worked out and I get so many compliments on it. All up it cost me around $15 dollars to make and I think it looks better than something I could have brought!
For the bottle vase you will need - An empty wine bottle (I used a clear bottle but a tinted one would be fine too!) - Acrylic paint - A small bowl So I looked all over the internet to find what sort of paint would be best suitable so I could pour it into the bottle so I would still get that smooth glossy finish. I had read that the acrylic paint I already had would be ok so went ahead with that. I first mixed a small amount of water into it to get a runnier texture so it would be easier to pour into the bottle. I then poured it, a small amount at a time, into the bottle until the inside was covered. I placed it outside, upside down on a plastic lid to let it dry. This took HOURS!!! But once it was eventually dry I brought some cheap, fake sunflowers to put into it. I love how this looks and was extremely happy with the result. However with the heat we were having the paint started to run and never really set to the inside of the glass so would go streaky which I hated. I eventually ended up buying a cheap outdoor house paint in white and poured this in over top of the existing paint and so far (a month later) the paint has stayed put! I loooove to DIY and clearly am pretty happy with how my projects worked out. If there are any DIY's you would like to see just let me know in the comments Nicole xxx 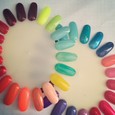 So I've recently decided that I need a space to keep all my hair/make up/nail bits and pieces. Since I've recently decided that I want to also add Gel Manicures and Pedicures to the list of services I do, I thought that I should have an entire room I can do it from. I was lucky enough to be gifted a trolley, a stool, a chair, over 50 nail polishes, nail tools and a few decor bits and pieces so this got me started. But the toughest part was finding a table that was suitable. Most were either too big in generally or too wide! 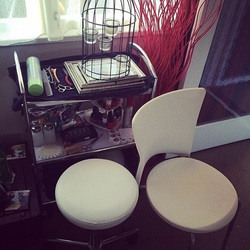 I have an obsession with DIY (which I will be doing more posts on later down the track) so I knew if I could find a cheap table I could turn it into something special. I had a colour theme in my mind as I love things to look clean and simple, so decided white would be my main colour. I wanted a 'natural' feel to the room so I decided that I would find a wooden table and shelf that I would varnish to get the look that I wanted. The only other colour I wanted to see in my room was that soft sandy gold colour that seems to be popular at the moment! I found some gorgeous photo frames that had a vintage feel to them that I thought would be perfect.  I wanted to have a few photos of some work I have done so I choose, a wedding, an Avant Garde look and a photo from a photo shoot. I also wanted something inspiration for me to look at, I ended up choosing the quote "Always remember, you are braver than you believe, stronger than you seem, smarter than you think and twice as beautiful as you'd ever imagined.' Which I think fits will with the theme of the room...and the general purpose behind the room! Now I just need to set up the rooms and find the perfect table and bookshelf!! But I'll tell you more about that in part two... Nicole xxx 
|
Fashion, Beauty and MeAn insight into the life of a Hairdresser, Make Up Artist and Fashion Junkie  Categories
All
Archives
September 2016
|

 RSS Feed
