|
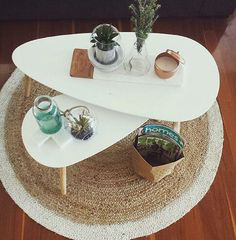
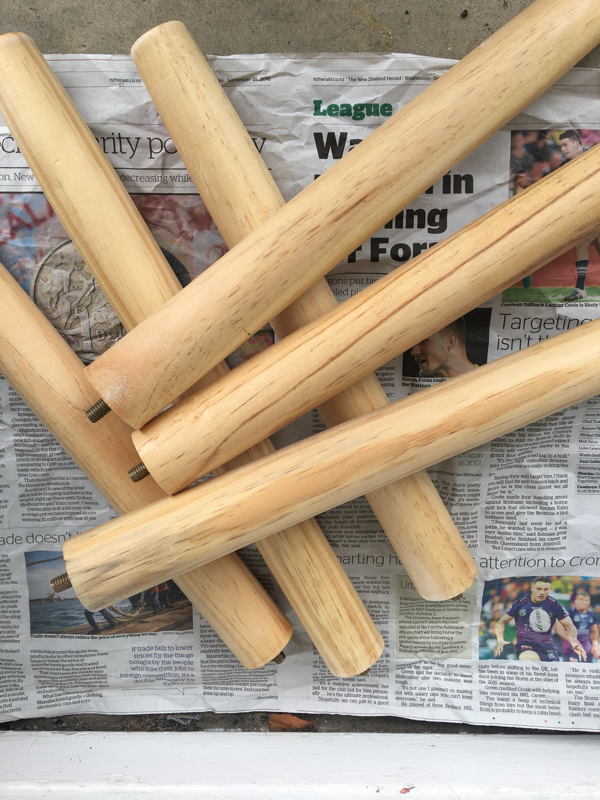
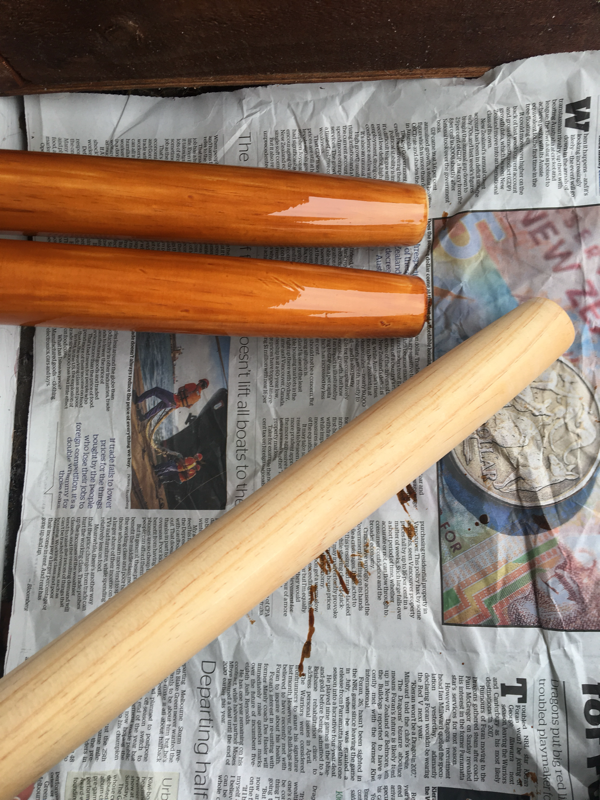
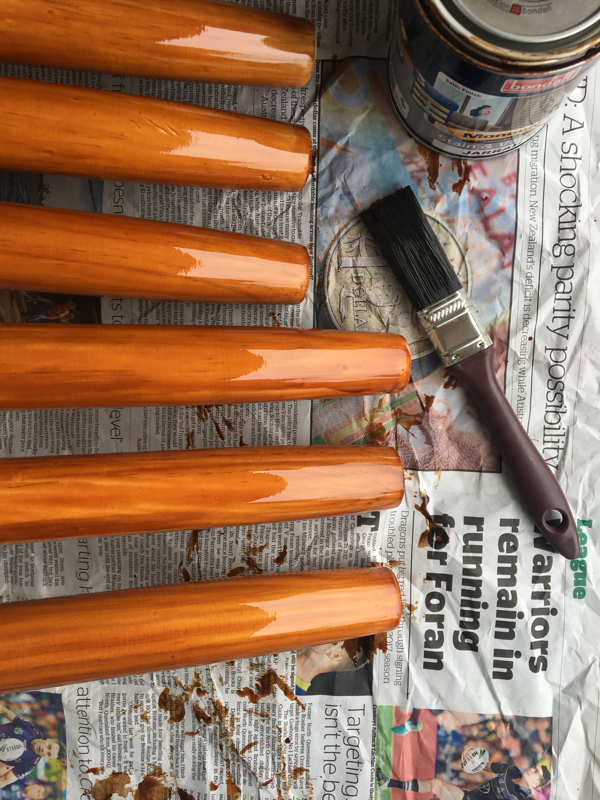
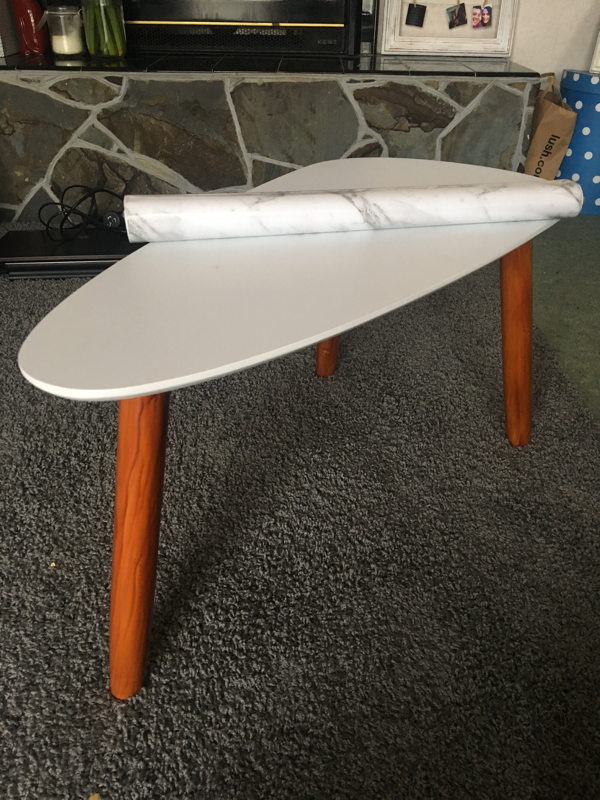
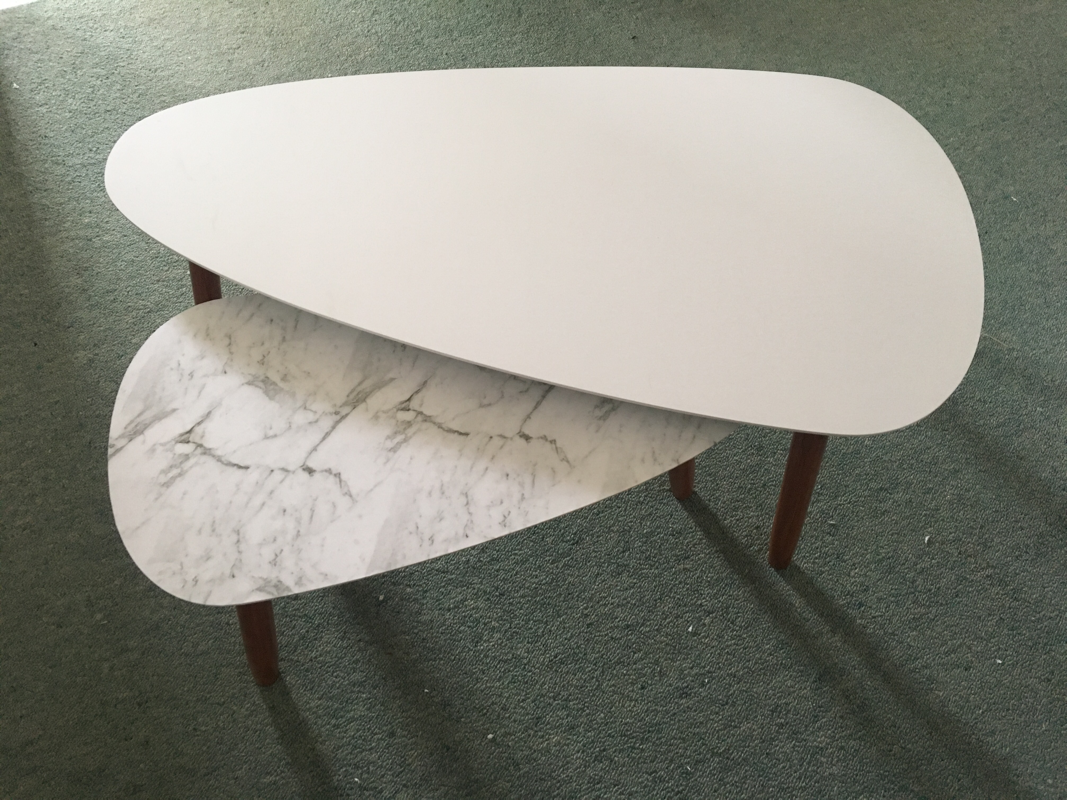
I have to say firstly, that this months DIY is my personal favourite (well so far!) I just LOVE how it turned out. Lately I have been loving doing small homeware DIY's. I love the way something so inexpensive can be made to look amazing..and at a fraction of the price it would cost for an luxury piece of furniture. 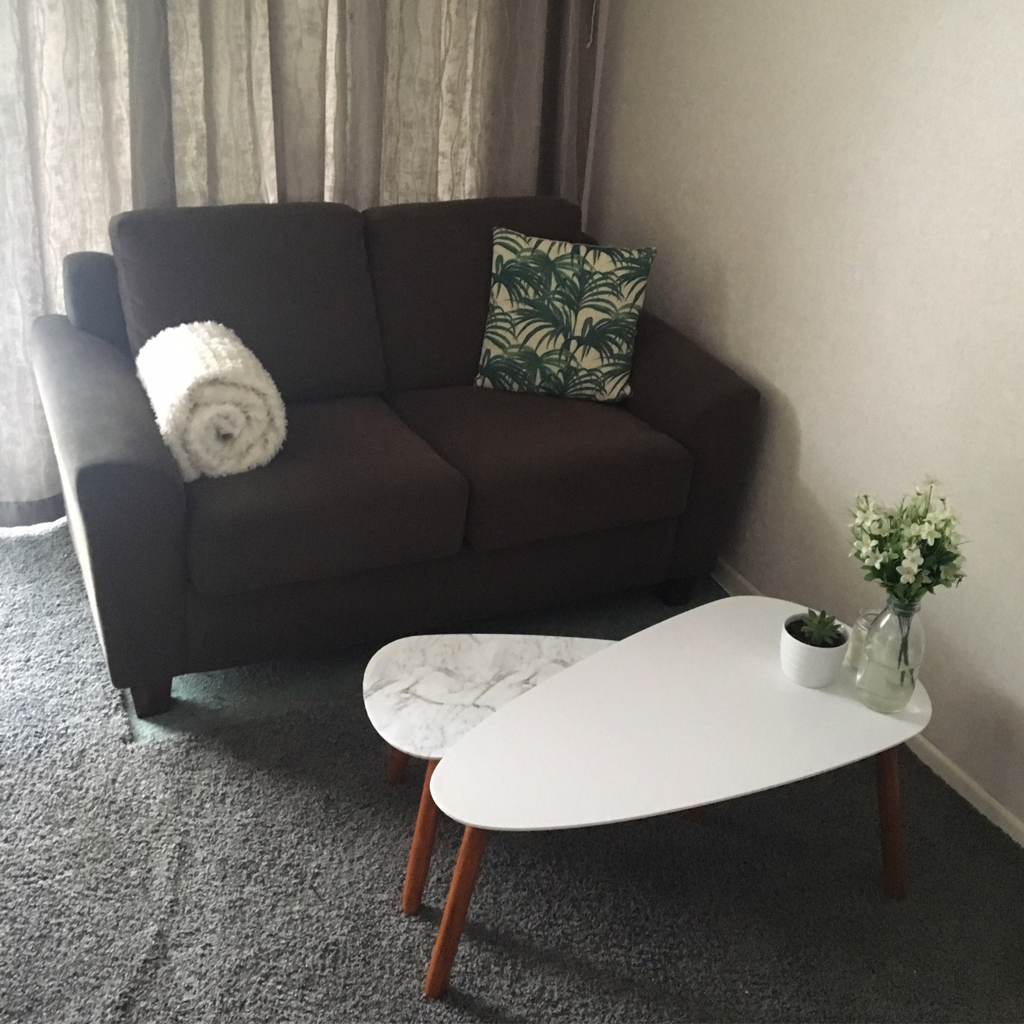 So this months DIY is my Kmart Hack coffee tables!! These inexpensive tables we're brought, as a set, from Kmart for around $40. However all of the furniture in my lounge is currently a dark varnished wood, so as much as I loved the tables..they would need to be upgraded to suit my decor. I also felt that have two white tables was a little bit much for the room, I wanted to break it up a little bit. I think the small table in the marble print is absolutely perfect. 1. Here is a before picture of the tables, I didn't take my own picture so this is one that came up on Google, it gives you a good idea of the changes made. 2. The first thing I did was sand the legs. These legs are real wood (which was what sold the set to me!) so I lightly sanded them to take off the outer coating that they put on, this also helps the varnish to adhere to the wood. 3. This photo was really just to show the drastic colour different between the varnished legs and the original legs. The varnished colour is the same colour I've used on all the furniture in my living areas..so it really does match everything perfectly! 4. Once I had finished varnishing all the legs, I let them dry 5. Next I got this gorgeous Marble Contact Paper, I picked this up from Kmart for around $6.00 and it had around 2m on it. This contact paper is amazing! It looks so realistic and it's one of the cheapest I've seen 6. Next I measured out the contact paper, I already knew the paper was wide enough so I cut enough for the length with around 5cm over hang 7. Next I slowly pealed back around 1/3 of the length of the contact paper and applied it to the table..ensuring there were no bubbles. I used a spatula to help flatten it out but you can find soft scrapers at the hardware store that would do a much better job 8. Next I cut slits around the edge of the corners of the table toward the edge of the table, so that I could wrap it under the edge as seamlessly as possible. I actually ended up having many cuts between each of these as it proved to be pretty difficult getting it flat..but you'll see a close up of that very soon! 9. Here is an up close photo of the edging, I know it's not perfect but unless you look close..I think it looks pretty good! 10. I probably should have stuck the contact paper to the table first then gone around and finished the edging..but I wasn't sure the edging would sit flat so I wanted to do a small area to test it, hence why there's a section completely done..and a section not even stuck to the table! So basically from here I went around and did what I had just done to the rest of the table. 11. Here is a close up of the table on its own, with the varnished legs back on and that gorgeous marble top! 12. And finally here are the two tables together. I think they look amazing! 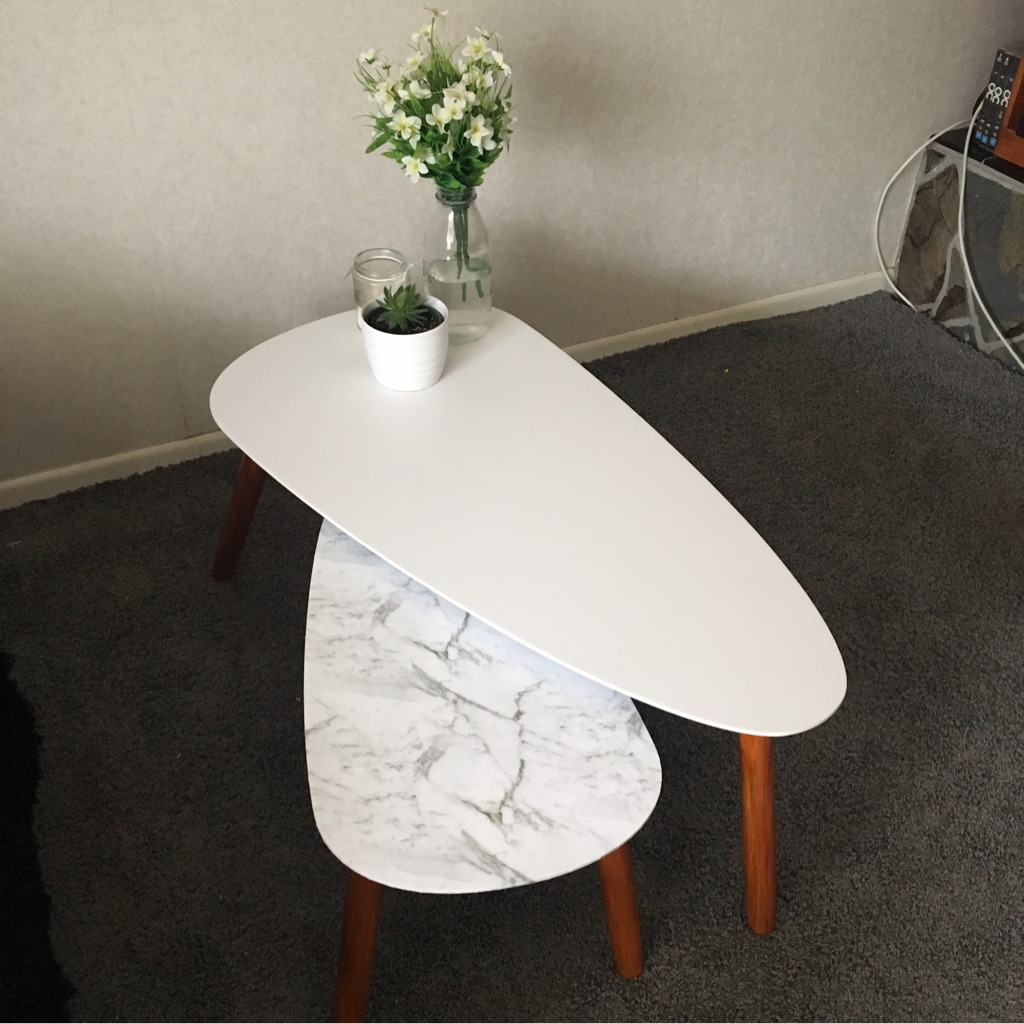 I am so happy with how these tables turned out!! I absolutely love them with a little succulent and candle on top. They are so simple but make a real statement in our living room.
I hope this has given you a little DIY inspiration, I have a couple more marble DIY's coming so keep a look out Nicole xx
0 Comments
 I am SO excited to be back and re-starting my blog. It's been a looong time since I've made a post and in that time I've definitely had a shift in interests so the style of the blog will be changing slightly.
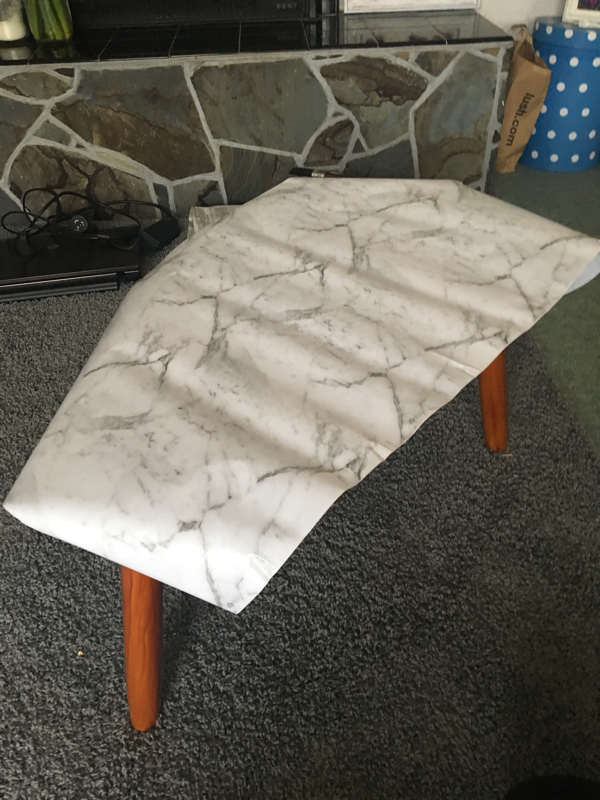
My interests still involve Make Up and Hair...but I have been loving DIY and fashion, more so than usual. And that is definitely going to be reflected a lot on my blog. It's always great to have a change right? So lined up I have a couple of DIY's, a Top 5 Lipsticks and more, I hope you guys are as excited as I am! I will also be revamping the look of my Blog to reflect these changes. So if there's anything you'd like to see..please let me know! Look out for my first DIY blog tomorrow, I promise it's a goody! Nicole x 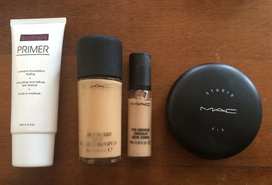 So today I wanted to do a little Make Up post. For the past few weeks I've had pretty bad skin, so I've come up with a routine to completely hide it without the skin looking too cakey. The products I use are: Australis Primer, MAC Studio Fix Foundation in NC20, MAC Prolongwear in NC15 and MAC Studio Fix Powder in NW20. When my skin is bad I always make sure I start with a really clean base and fresh brushes, to do this I use my Estee Lauder Cleanser, Toner and Moisturiser (I have a past post about these that I can link below if anyone wants to see it). I then apply the Primer, concentrating mainly on the bad areas and blending out to the rest of my face. I then let it sink in completely..this can take up to 5 minutes. 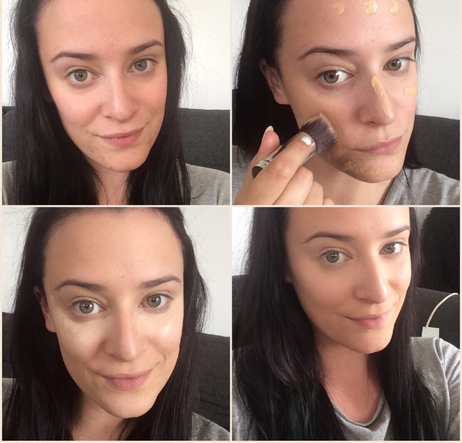 Then, using clean hands, I use the tip of my finger to dot some foundation all over my face straight from the bottle. I then use my clean flat top brush and blend it all in. I find that the more I blend Studio Fix foundation the more flawless it looks so take some time really blending it. I then apply a small amount of concealer (you will only need about half a pump of this one) to the back of my hand and using a pointed face brush (you could also use a beauty blender but I find if my skin is really bad the pointed face brush better) I blend it all out. I also apply it under my eyes in a triangle shape and blend out towards my hair line. If my skin is still not completely covered (it generally is but if I am going somewhere where photos will be taken I usually do this next step) I apply a tiny amount of my foundation to the bad areas and blend out. For some reason layering in this way doesn't leave a cakey finish. I then apply my Studio Fix Powder all over my face and it's set! I find this will last an entire day at work and makes my skin look flawless.
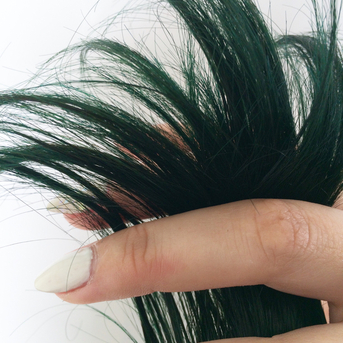
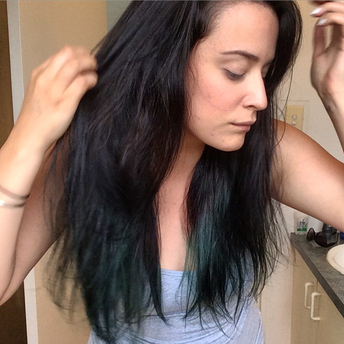
What products to you use for those terrible skin days? Nicole xx 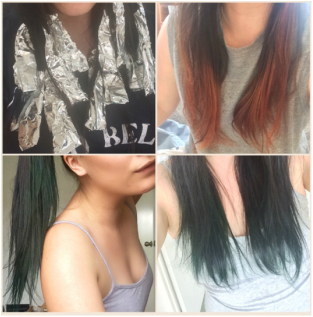 I was in one of those moods where I really need a change. A couple of months ago I decided to buy the La Riche Directions Semi Permanent colour in Alpine Green. Ever since Kylie Jenner had her green dip dye, I've been obsessed. I did a lot of research on this hair colour and for the price it sounds perfect (I will review it properly in the coming weeks). The first thing I did was use some supermarket bleach and strip the ends. As my hair is so dark and has been coloured a few times already it only really lifts down to and orangey gold. However this is perfect for a Forrest green. I wrapped all the individual sections in tin foil to make sure I didn't make a mess while processing too. Once developed I let it dry completely, I then started at the bottom and dyed my roots and mid lengths with a dark brown, I wanted to refresh the base colour of my hair to make the green really pop. I then applied the green to the lightened hair section by section until all my hair was done. I then carefully rinsed the base colour then took out the foils and rinsed the green. I then applied a treatment and let it air dry. I haven't properly styles my hair yet as I wanted to give it a break (this also gives an idea in the photos just how dead straight my hair is!) but I love the colour! In real life it's vibrant in the light but blends in quite well in normal light. I think as I wash it, the colour will become more vibrant as it gives which I'm looking forward to! It definitely makes me think about dying the whole thing Forrest green! It's surprisingly more subtle then you would think..in natural lighting anyway! Let me know if you like the new hair and I'll do an updated post with a full review of the product I used after I've washed and styled it a few times Nicole x
Ever since I started buying MAC eye shadows, I started building a palette. It is soo much easier having all of your eye shadows in one place as opposed to a million little pots. So I decided to depot a couple that aren't actually MAC, but fit into the MAC palette, into my palette to give my make up space a little extra room. 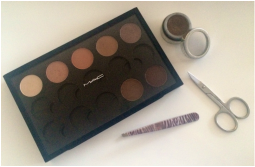 So to start off you'll need a few house hold things. Here I have the MAC palette I'm slowly building, my brow powder which is Jordana's Deep Brown Eyeshadow powder, a pair of tweezers and a pair of nail scissors. I also suggest you have some tissues for where you depot as it can get pretty messy. The first thing you will need to do is find the gap between the eye shadow pot and the base holding the eye shadow pan. 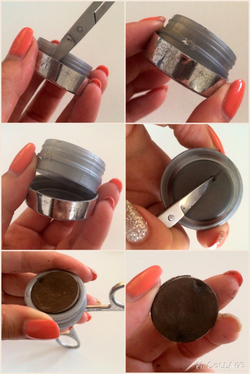 You then need to gently push the edge of the scissors gently into the side, I worked them all of the way around until it had loosened. You should then be able to work the scissors beneath the base holding the pan and it should pop up. I then used the tweezers to grab hold of it and pop it out completely. If you turn the base holding the pan upside down you'll see a small hole, you need to use the scissors again and work them gently into it. There's alot of glue holding the pan down and if you press too hard the eyeshadow can break. I gently ran the thinnest part of the scissors around the pan to help release it. This took a little while but I'd rather be gentle with it then have it completely shatter. After working at it for a little while it should just pop out. I got a little crack in the side so I put a few drops of alcohol into it then gently pressed it back down with a cotton bud. It was then all done! I moved one of the eyeshadows and popped it in. It still had enough glue on the bottom that it stayed in the palette with out having to glue a magnet to the back. Now all that's left to do is fill the rest of my palette! Let me know if you have any suggestions Nicole xx 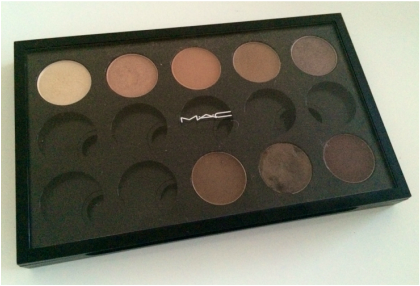
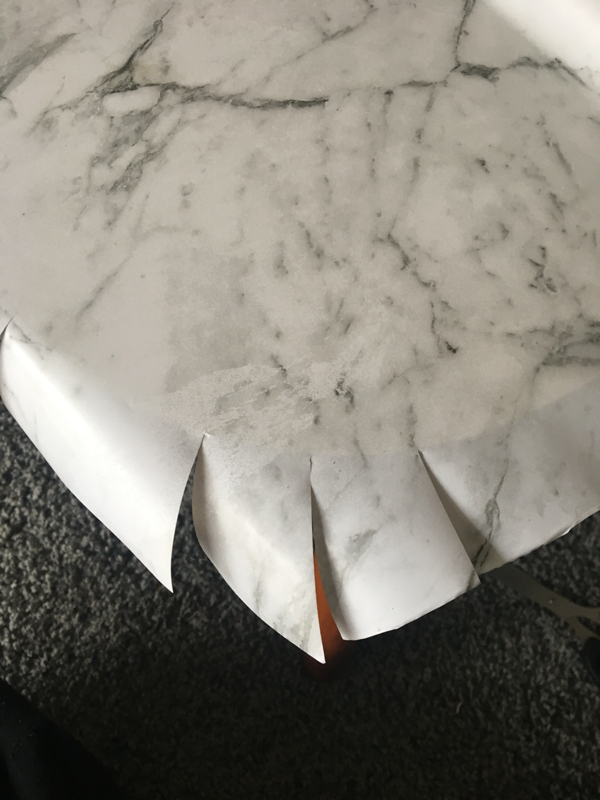
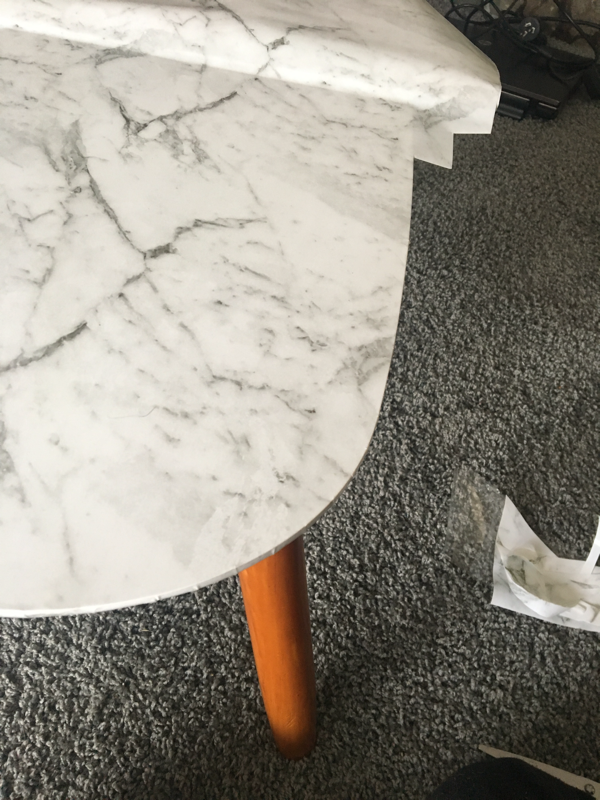
Towards the end of last year I got some Permanent Lash Extensions. Years ago I had some Lash Extensions and had a pretty hard time with them. The base (I'm not sure if this is the correct term but I'm meaning the end that's actually glued to your lash) came loose after a matter of days and my eyes because pretty irritated as they kept scratching my eyes. When I inquired as to how much it would cost to have them removed, it was basically the same cost as having them put on so I took matters into my own eyes and slowly and painfully pulled them all off. My lashes weren't as bad as I had expected but were definitely not in good shape. However I had a friend who had some lash extensions applied that looked so good I decided to try it again! 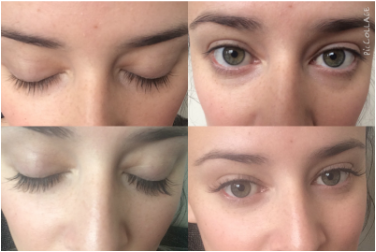 I have quite long, very dark eyelashes to begin with, I just have very little of them so it doesn't create any impact without mascara. I decided to get a half set which I wanted more to help create a curled effect (I have very straight lashes that don't curl at the best of times) and help to make them look a little fuller as well. The results looked amazing! I felt like it changed the shape of my eyes completely and they really helped with my straight lashes. The thing with lash extensions is that you have to be really careful what you use around them and by this I mean make up removers and products. My everyday eye make up consists of winged eyeliner and to remove this you need a pretty good make up remover. You also can't scrub or be too rough around them so this requires a long slow process of gently wiping at the eyeliner to remove it. The other thing is that applying eyeliner in the first place is a mission. The lashes create a different line along the lash that makes it hard to get a straight line. If you don't wear too much make up then I would say these would be a great idea for you. But if your like me and like to play with make up then maybe not so much. The other thing I found was that my eye's started to become irritated after about a week, they were just red and itchy and not being able to touch this was hard work. I ended up, once again (after not being able to get a removal treatment), removing them myself but this time I used coconut oil and make up remover pads and they slid off pretty easily. All in all I just don't think lash extensions are for me. Although they look beautiful and saved a little time in the morning I just don't think, for me, they are worth the hassle or what happens to my eyes as a result. Nicole xx 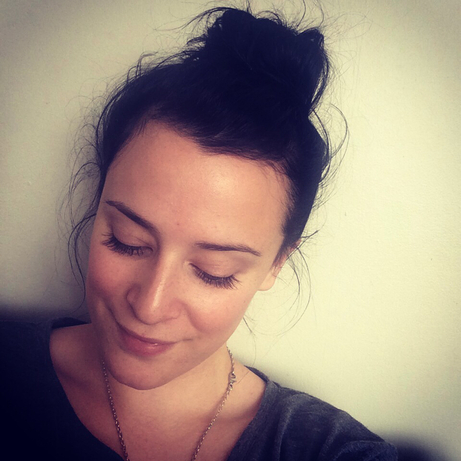
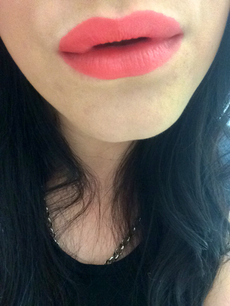
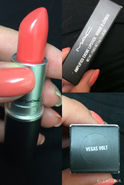 I have recently been purchasing quite a bit of MAC, my aim is to be able to do a full face of just MAC make up as I love the brand and everything I have collected so far I have loved! During this process my collection of lipsticks has grown (with many more on the NEED list). I have to say though that MAC's Vegas Volt is a game changer! This lipstick is a beautiful Summer shade and is such a gorgeous vibrant coral colour. However I think it is subtle enough to be worn everyday. It glides on easily and is an Amplified finish so it is extremely pigmented. I also have Ravishing which looks similar in the tube but is a Cremesheen so is not as pigmented and more has more of a sheen to it, so if your after something much more subtle. This would be it. I am also really impressed with the staying power! It lasted a full day at work with a slight touch up after lunch and I hadn't used any lipliner so I was extremely impressed. Overall I highly recommend this lipstick for all skin tones and any one who needs a pop of colour in their life! Nicole xx
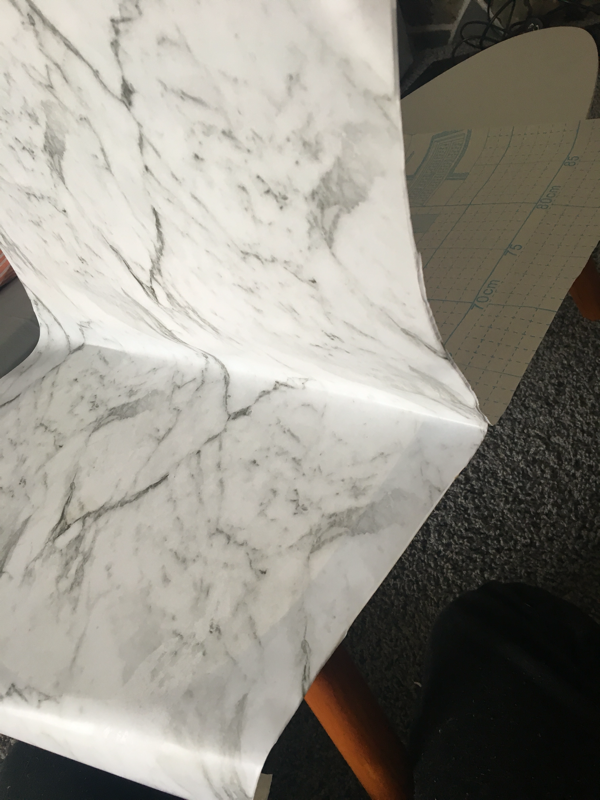
Well here we are in 2015! It's been an incredibly busy few months and I'm glad to be back! This year I aim to have at least one (if not more) blog posts up per week. I have so many new exciting products that I'm dying to tell you all about and plenty more products on their way for review. This year I aim to wear more lipstick (which I NEVER do) so I'm going to do plenty more tutorials with these. I also have a few different hairstyles and colours I've been dying to try out so keep an eye out for that too! If there is anything on particular you would like to see on my blog please let me know. See you next week :) Nicole xx 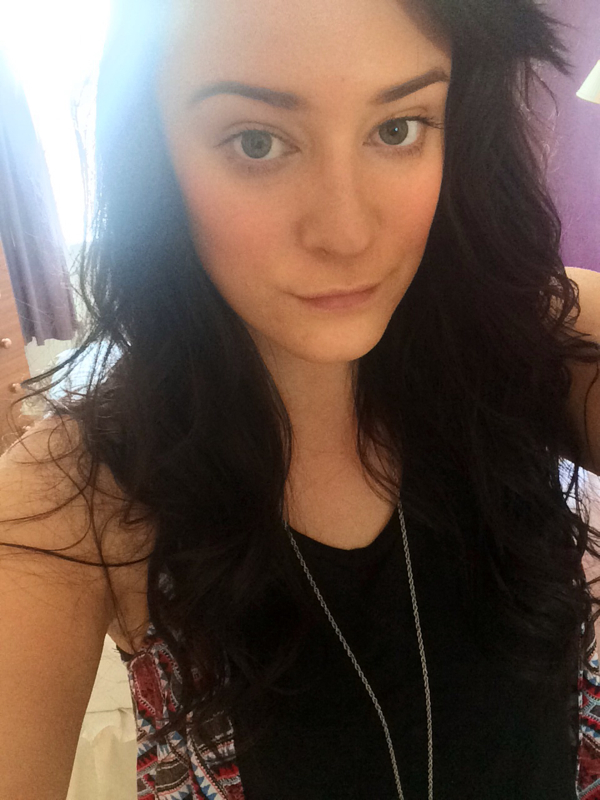
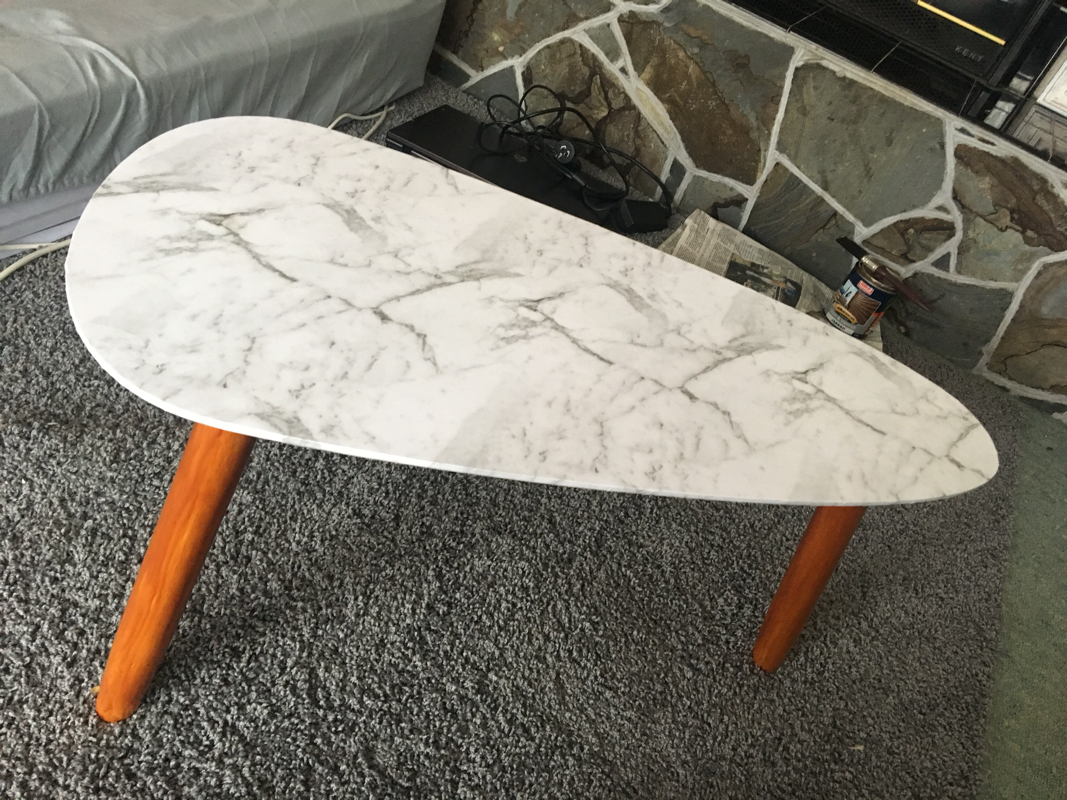
I wanted to do a quick explanation on how I do my big messy waves. I get a lot of questions about this and it's the quickest, easiest hair style I do on a day to day basis. I love it though because it looks like I've put a lot more effort in then I have. So to begin I start with clean dry hair and I spray a little heat protectant in. Then I section it it half down the back. Starting on one side I divide it into four sections (these are just round messy sections but go from my part line to my nape, or ear etc but are always in a downward motion) I then grab the thick section of hair and hold it out. I curl it away from my face using straighteners. I then do the same to the other side. I then give my hair around 10 minutes to cool down completely and brush it with a normal paddle brush. Spray a little hair spray and your all done! This takes me around 15 minutes all together including cool time and it always looks so lovely. This was extremely hard to photograph so I just put a photo of the finished product below. I hope this helps with your hair styling! Nicole xx 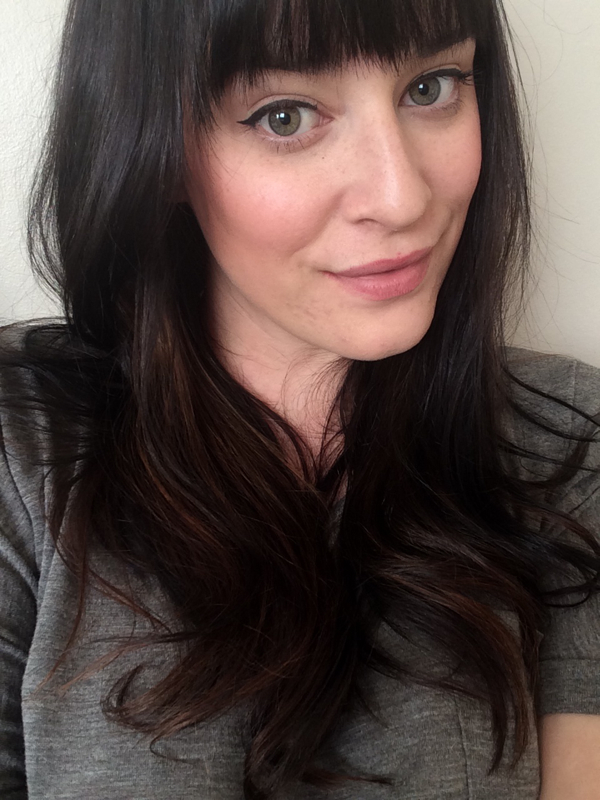
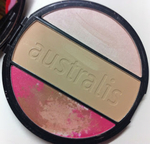 So I often get asked how I contour and highlight, so I thought I would begin with explaining how I highlight and my favourite highlight! My favourite highlight is the actually in a face kit I have from Australis. It is called the Face-a-holic Touch and Go and comes with a blush, pressed powder and highlighter. This highlight is a champagne colour and is highly pigmented. It is buttery soft and blends out so beautifully. This set is really reasonably priced and each product is amazing. To use the highlight I begin by apply my base and contour, I then get a soft fluffy brush and get a small amount of product on the edge. I then apply this just above/on top of my cheek bone really lightly. I find with highlight it's easy to be too heavy handed with it so go soft! I then get my fluffy powder blush and blend it out. I also apply a little bit on my Cupid's bow using the tip of my finger. This highlight is also perfect for using on the brow bone, down the nose and in the inner corner of the eyes. Just make sure you blend out and don't apply to heavy! A highlight should only be a light shimmer not a heavy stripe. It should be so light that it's not obvious when looking but the in the light you should be able to see a soft shimmer that lifts the check bones and defines the faces natural bone structure. In the pictures below the first is the before where my skin is looking quite matte and flat. The second you can just see how the top of my check bone a soft shimmer which in turn has left me a slightly more defined check bone. Let me know how and where you apply you highlight and stay tuned for the contour how to. Nicole xx 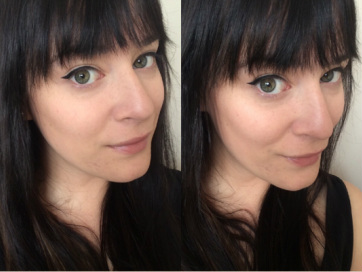
|
Fashion, Beauty and MeAn insight into the life of a Hairdresser, Make Up Artist and Fashion Junkie  Categories
All
Archives
September 2016
|


 RSS Feed
