|
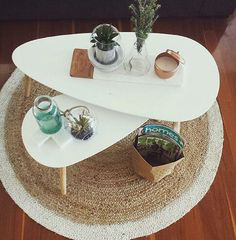
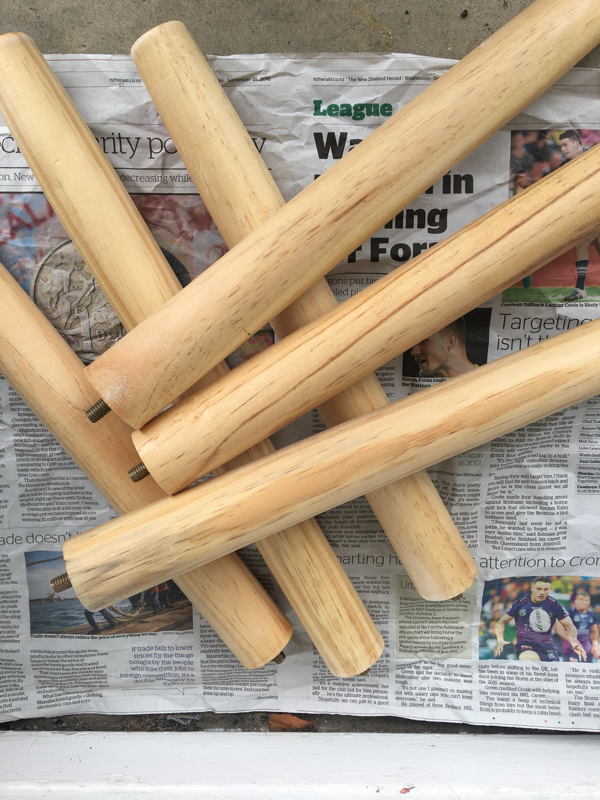
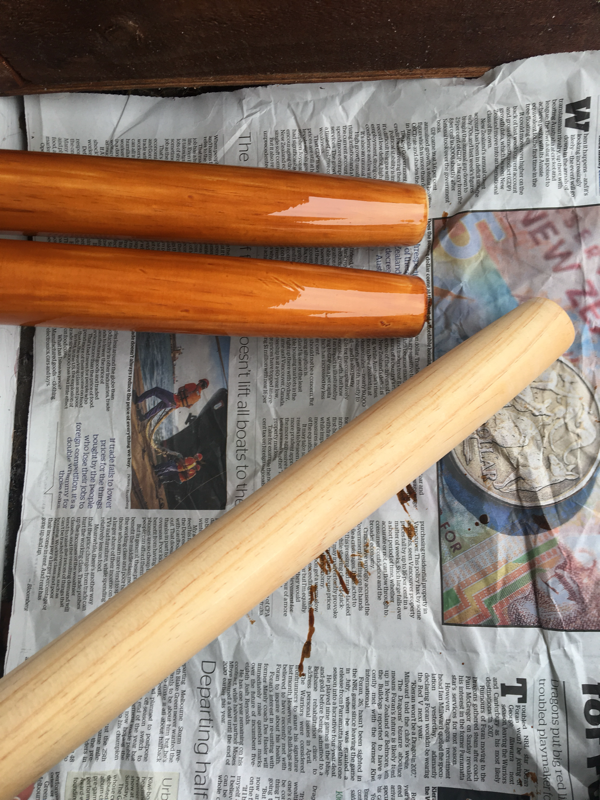
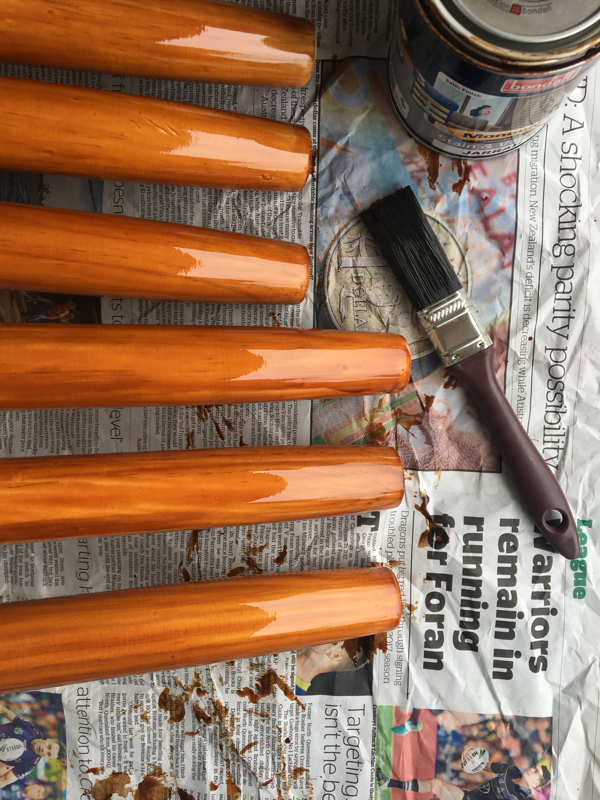
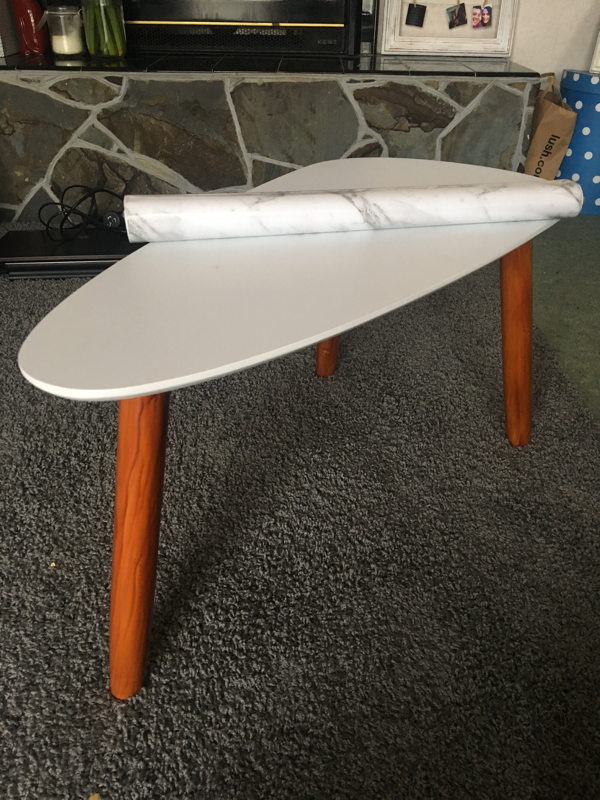
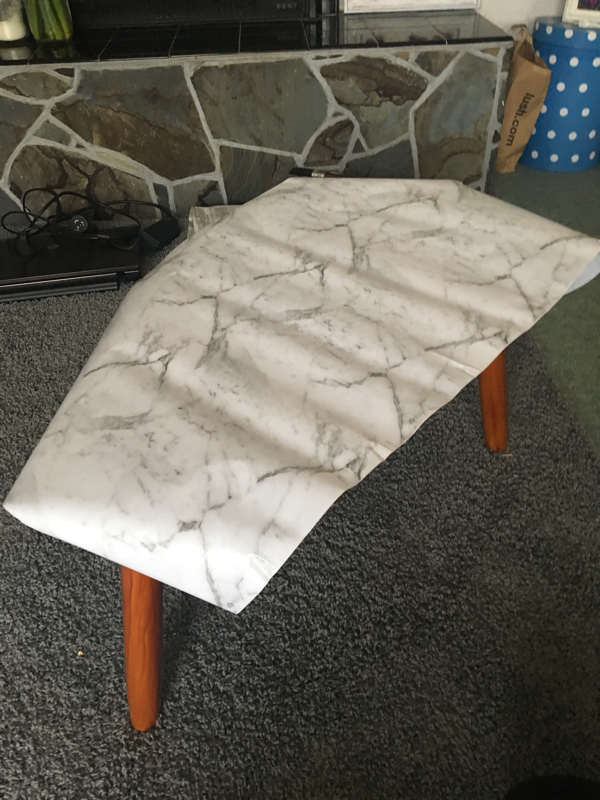
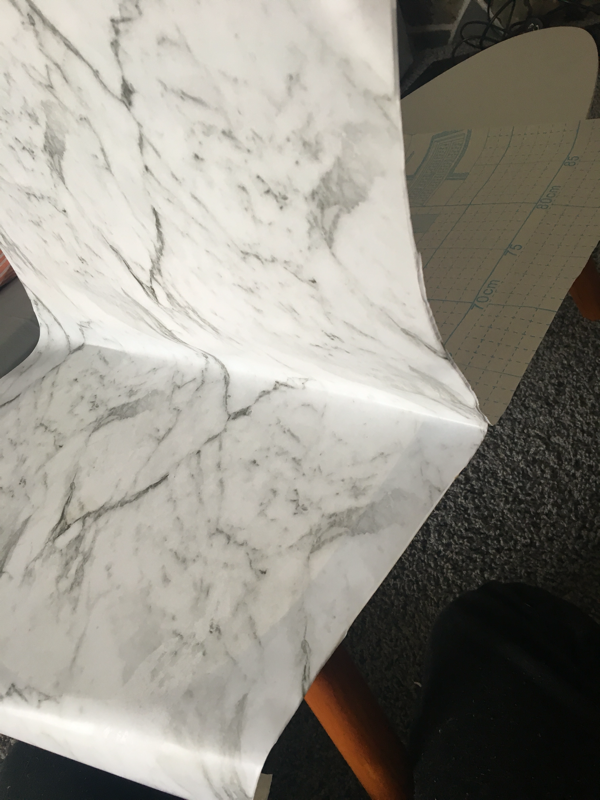
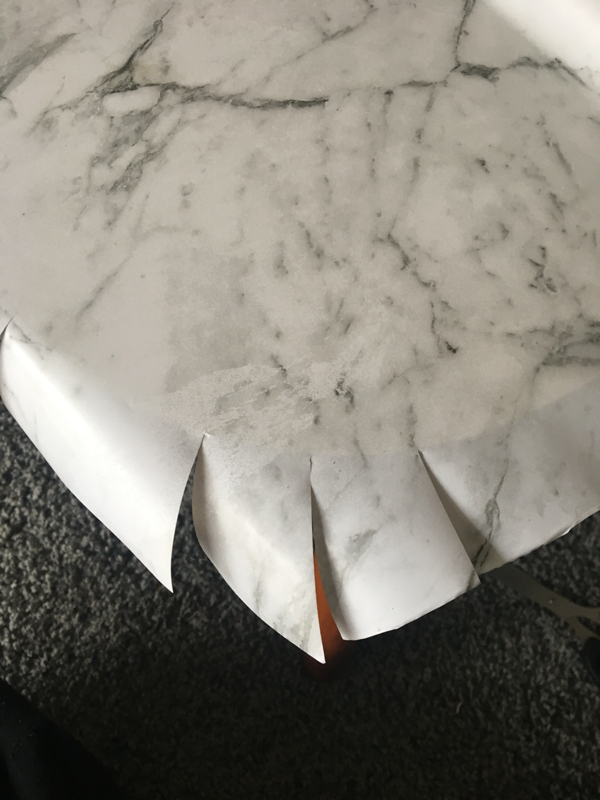
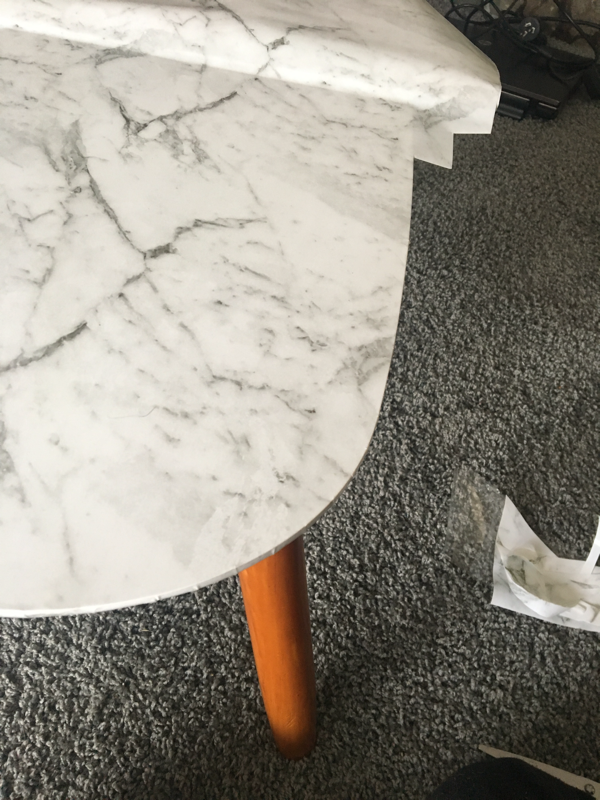
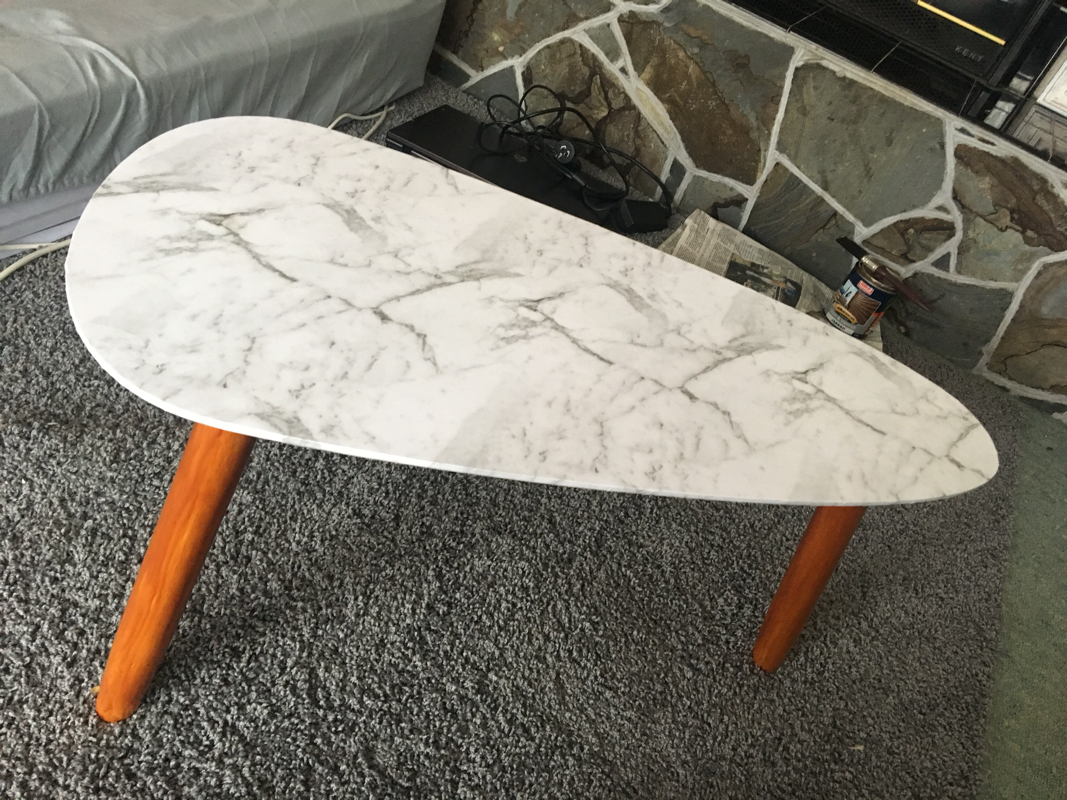
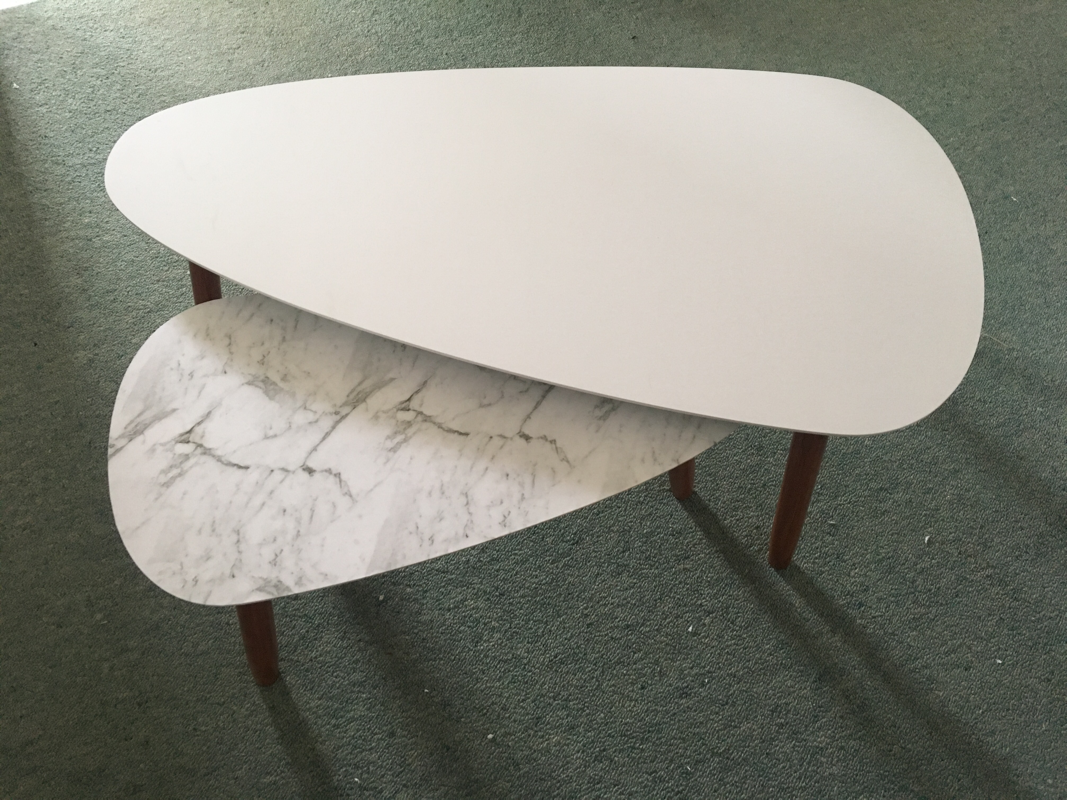
I have to say firstly, that this months DIY is my personal favourite (well so far!) I just LOVE how it turned out. Lately I have been loving doing small homeware DIY's. I love the way something so inexpensive can be made to look amazing..and at a fraction of the price it would cost for an luxury piece of furniture. 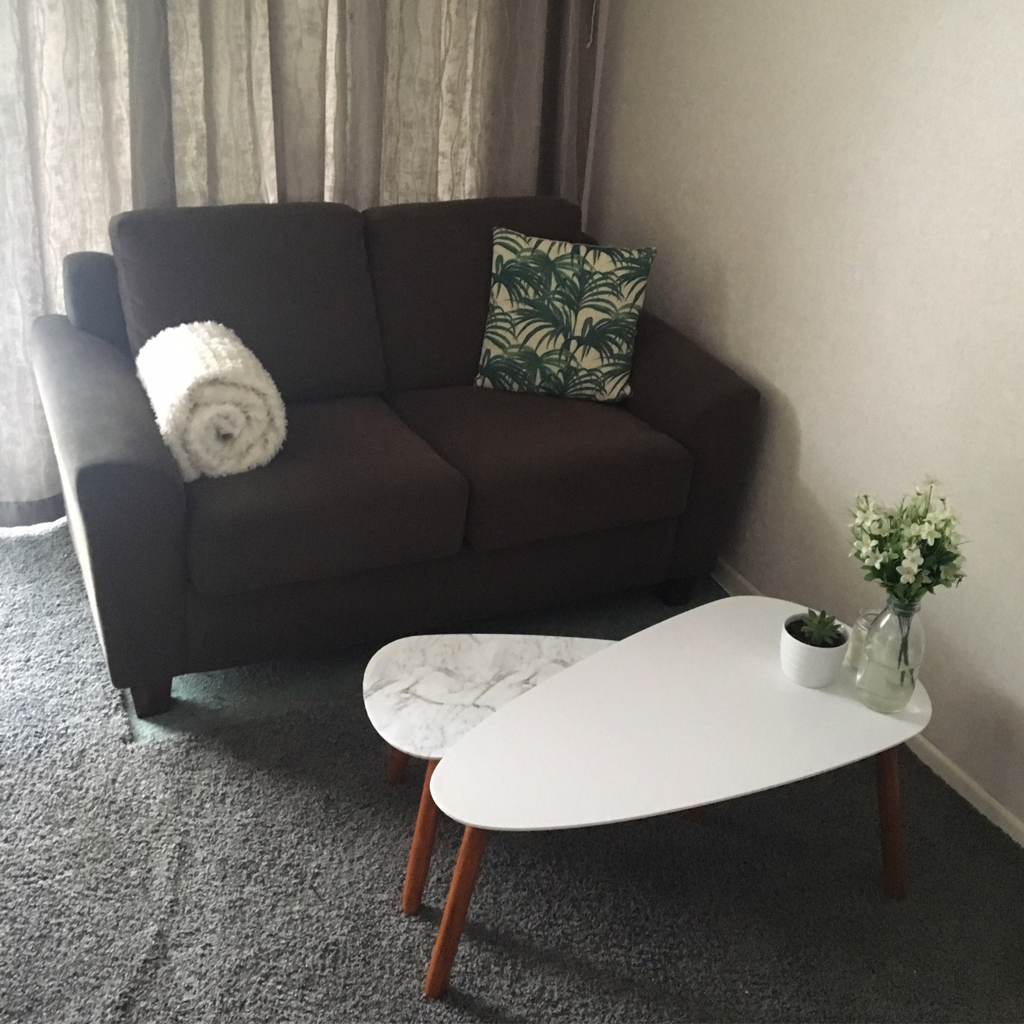 So this months DIY is my Kmart Hack coffee tables!! These inexpensive tables we're brought, as a set, from Kmart for around $40. However all of the furniture in my lounge is currently a dark varnished wood, so as much as I loved the tables..they would need to be upgraded to suit my decor. I also felt that have two white tables was a little bit much for the room, I wanted to break it up a little bit. I think the small table in the marble print is absolutely perfect. 1. Here is a before picture of the tables, I didn't take my own picture so this is one that came up on Google, it gives you a good idea of the changes made. 2. The first thing I did was sand the legs. These legs are real wood (which was what sold the set to me!) so I lightly sanded them to take off the outer coating that they put on, this also helps the varnish to adhere to the wood. 3. This photo was really just to show the drastic colour different between the varnished legs and the original legs. The varnished colour is the same colour I've used on all the furniture in my living areas..so it really does match everything perfectly! 4. Once I had finished varnishing all the legs, I let them dry 5. Next I got this gorgeous Marble Contact Paper, I picked this up from Kmart for around $6.00 and it had around 2m on it. This contact paper is amazing! It looks so realistic and it's one of the cheapest I've seen 6. Next I measured out the contact paper, I already knew the paper was wide enough so I cut enough for the length with around 5cm over hang 7. Next I slowly pealed back around 1/3 of the length of the contact paper and applied it to the table..ensuring there were no bubbles. I used a spatula to help flatten it out but you can find soft scrapers at the hardware store that would do a much better job 8. Next I cut slits around the edge of the corners of the table toward the edge of the table, so that I could wrap it under the edge as seamlessly as possible. I actually ended up having many cuts between each of these as it proved to be pretty difficult getting it flat..but you'll see a close up of that very soon! 9. Here is an up close photo of the edging, I know it's not perfect but unless you look close..I think it looks pretty good! 10. I probably should have stuck the contact paper to the table first then gone around and finished the edging..but I wasn't sure the edging would sit flat so I wanted to do a small area to test it, hence why there's a section completely done..and a section not even stuck to the table! So basically from here I went around and did what I had just done to the rest of the table. 11. Here is a close up of the table on its own, with the varnished legs back on and that gorgeous marble top! 12. And finally here are the two tables together. I think they look amazing! 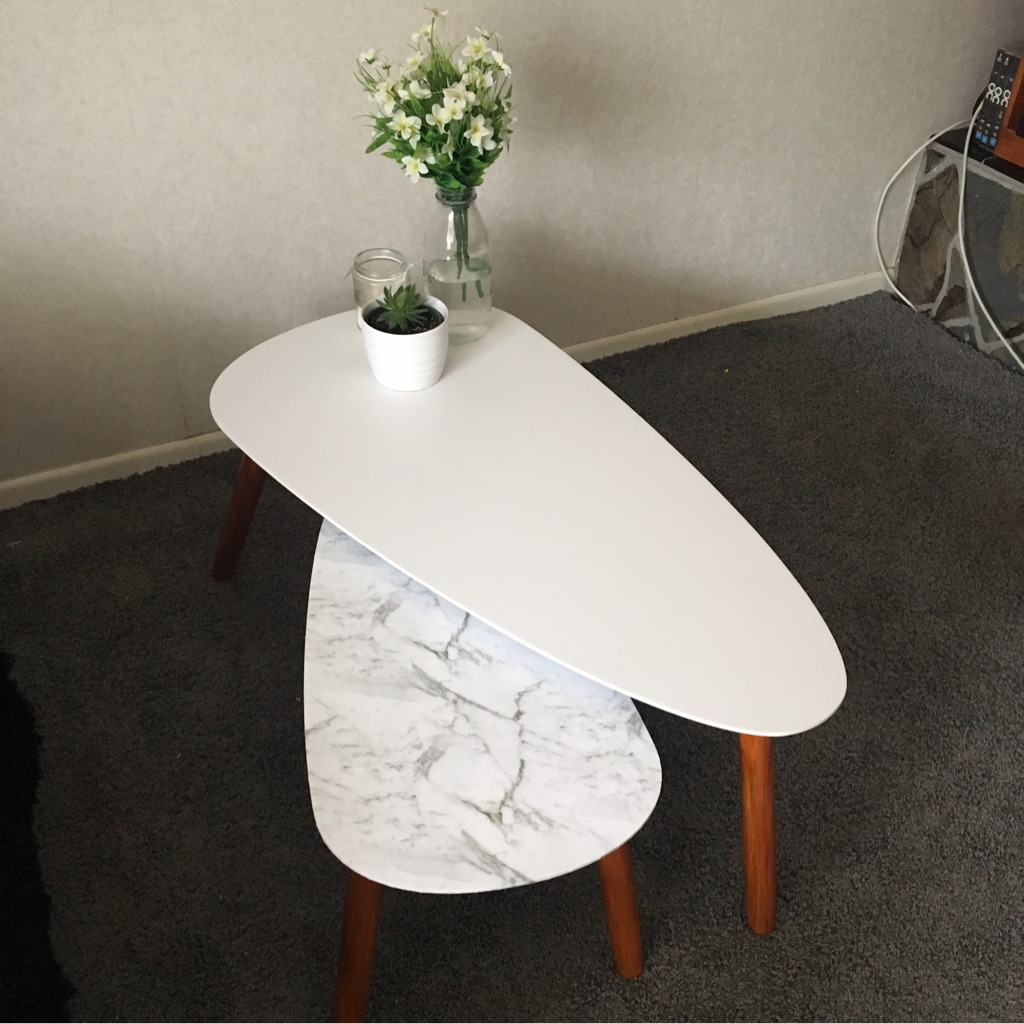 I am so happy with how these tables turned out!! I absolutely love them with a little succulent and candle on top. They are so simple but make a real statement in our living room.
I hope this has given you a little DIY inspiration, I have a couple more marble DIY's coming so keep a look out Nicole xx
0 Comments
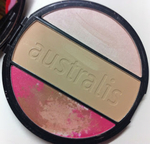 So I often get asked how I contour and highlight, so I thought I would begin with explaining how I highlight and my favourite highlight! My favourite highlight is the actually in a face kit I have from Australis. It is called the Face-a-holic Touch and Go and comes with a blush, pressed powder and highlighter. This highlight is a champagne colour and is highly pigmented. It is buttery soft and blends out so beautifully. This set is really reasonably priced and each product is amazing. To use the highlight I begin by apply my base and contour, I then get a soft fluffy brush and get a small amount of product on the edge. I then apply this just above/on top of my cheek bone really lightly. I find with highlight it's easy to be too heavy handed with it so go soft! I then get my fluffy powder blush and blend it out. I also apply a little bit on my Cupid's bow using the tip of my finger. This highlight is also perfect for using on the brow bone, down the nose and in the inner corner of the eyes. Just make sure you blend out and don't apply to heavy! A highlight should only be a light shimmer not a heavy stripe. It should be so light that it's not obvious when looking but the in the light you should be able to see a soft shimmer that lifts the check bones and defines the faces natural bone structure. In the pictures below the first is the before where my skin is looking quite matte and flat. The second you can just see how the top of my check bone a soft shimmer which in turn has left me a slightly more defined check bone. Let me know how and where you apply you highlight and stay tuned for the contour how to. Nicole xx 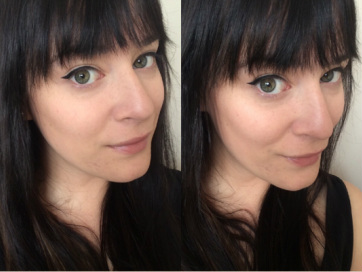
For the second Top 5 I wanted to do something non beauty related. I've recently been growing my DVD collection so I thought I would share my Top 5 Movies! 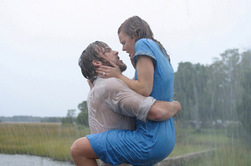 These are in no particular order but he first one I'll talk about is The Notebook. Ryan Gosling. I don't have to continue but I will! This movie is the sweetest love story and I love the way the movie is filmed. It's beautiful and tasteful and tells the story perfectly. Ryan Gosling is the perfect Noah and Rachel McAdams is the perfect Allie. If you haven't seen this movie I highly recommend it..but don't forget a box of tissues!! This movie is also based on a book by Nicholas Sparks which is amazing so if you don't want to watch the movie definitely read the book!  One of my all time favourites is The Lion King. I've loved this since childhood and everytime I watch it (even as an adult) I still absolutely love it. Incase you haven't seen it it's basically about a lion pride that's leader is killed by his brother, the son of the leader is lead to believe that he kills his father so runs away. It follows his journey of growing into an adult lion and all the friends he makes along the way. 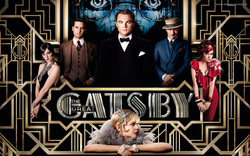 A new favourite is The Great Gatsby, this movie is amazing!! The costumes, hair and make up are incredible and the actors are brilliant. It's more or less an action/drama with a love story subtly chucked in there (the love story becomes more obvious as the movie progresses!). It's about a man who falls in love with a woman but they basically fall out of touch for different reasons. She meets another man and marries, it then follows Gatsbys journey to trying to win her back. Even though it's based around a love story it isn't the main focus of the film (for the most part) so men and women will love this movie.  A movie I absolutely love in the first Sex and the City Movie. I love the series so the movie was just an extension of that! If you haven't seen the series, SATC is about four woman who are best friends living in New York who are going through life (and men!) and it pretty much just follows their journeys from single woman to married with children. This movie is so funny and has some really sad parts too. The fashion, hair and make up is phenomenal so if you love everything fashion then this alone would be a great reason to watch.  Lastly is The Hunger Games, this is a newer favourite as well but I just love the concept of these movies. The story basically is that all the poor people love in districts..the rich live in the capital. Each year a boy and girl from each district is chosen to pretty much fight against children from all the other districts until only one survives. This may sound terrible but it's a really good movie! It follows one girls journey through it all and how she survives it. This movie has a bit of action, blood an guts and of course a love story.
There is my Top 5 movies for the mean while! If you have any recommendations for me please just pop them below Nicole xx 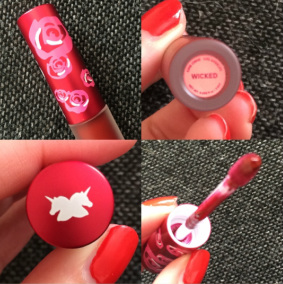 I've always wanted to try Lime Crime but just never gotten around to buying it. I love the packaging and the colour range, they offer something so different but still pretty wearable. When I saw the new Velvetines collection I knew I needed one! The new collection has three colours and is called the Witches collection. The colours are a black, deep red and a brown with a hint of red. The idea behind the Velvetines is that they are a liquid lipstick that dry completely matte. They are transfer proof, touch proof and long wearing. I decided on the deep red. Firstly this lipstick smells amazing!! Like sweet caramel almost. They have a standard lip applicator which I think makes a pretty easy application. If you are new to lipstick I recommend a lip liner though. The product it self is very pigmented and I applied one layer and worked it in until it was even. I didn't have to re-dip the applicator for more product there was more than enough. It took a couple of minutes to dry and was completely matte and didn't have a dry feel to them. Around five hours later I had lunch and this did take a little of the product off but nothing that couldn't have been easily touched up. It did begin to feel pretty dry though so I used a light lip balm over it which did lift more of the product. Instead of touching up with the lipstick I used a normal deep red lipstick and it looked fine. All up it lasted around seven hours before I took it off. This product is really long wearing and the colour is beautiful, I just suggest that you pick what you eat carefully! I had sushi and the soy sauce was just too oily for the lipstick so shifted it more than what other food would. I do highly recommend them however! If you have naturally dry lips just ensure you apply lip balm at least 30mins before applying. Nicole xx 
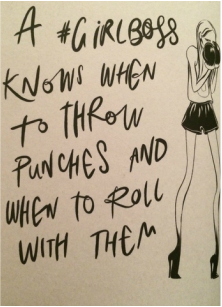 About a month ago I purchased the book #GIRLBOSS by Sophia Amoruso, who is the Founder and CEO of Nasty Gal. I had heard alot of hype about this book so really wanted to read it and see what all the fuss was about. This book isn't a traditional Self Help book, it's written more as a life guide and basically tells you how Sophia has navigated her way through numerous obstacles and created a really amazing business. She started from the absolute bottom, homeless and 'dumpster diving' to becoming the CEO of a multi million dollar company and the way she got there is really inspirational. It begins right back when she started Nasty Gal and how brought second hand clothing and styled it, in such a way that it would sell really quickly and for a profit. You then follow her journey to when she comes successful on eBay and moves on to starting her own website and employing her own staff. The way she writes (and I can imagine talks) is quirky and straight to the point. She is a no messing around kind of woman and doesn't take the decisions she makes lightly. I love the way you watch her business grow, as well as herself and the way she develops the business into what it has become is really inspiring. While I am making this book sound like it's a really heavy, serious read it's really not. The way it's written is easy to read and also really enjoyable. She has heaps of little quotes and pictures that capture the moment really well and you can not finishing reading this book without feeling completely inspired. I highly recommend this book! Nicole xx 
So I have been looking at BH Cosmetics for a long time now so I decided to grab a few bits and pieces to try and review! 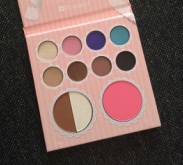 The first thing I got is the one I was most excited about, the BH Cosmetics That's Heart Palette. This gorgeous palette was developed with Youtuber Heart D from her channel That's Heart. Firstly the packaging is beautiful. This is one thing that definitely caught my eye. This palette contains 8 eyeshadows, a blush, and Bronzer and highlight. The Bronzer, blush and highlight all look to be beautiful colours. The eyeshadows are all shimmers, but not heavy glittery ones. There is a good range of colours which include some gorgeous brights! I'll be doing a How To and Review of this so stay tuned for that!  I've been wanting the Naked Palette forever so as a substitute I decided to try the BH Forever Nude Palette. This palette has 6 eyeshadows, a highlight, blush, bronzer and 2 lipsticks. The Bronzer is quite light but the blush is a peachy pinky. The eyeshadows are basically all shimmers and are in varying shades of pink/purple and bronze/gold. They would definitely create some gorgeous day time looks and I can't wait to play! The lipsticks come in a neutral peach nude and a mid tones neutral pink. The downside of this palette is that the packaging is plastic and cheap looking. It looks like it could be a child's play palette so it's a little disappointing but I look forward to trying the products. 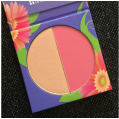 I also grabbed one of the blush duos in Daisy. This duo has a highlight and blush and looks so stunning. The blush is a peachy pink and looks like it will create a soft flushed look and the highlights a golden/yellow tone which I think will be amazing on yellow based skin tones. The packaging of this is so beautiful, it's a soft lilac with multi coloured daisies all over it and I love it! 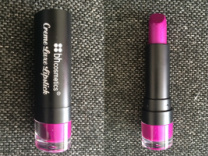 The last thing I got was a lipstick. This is the BH Cosmetics Creme Luxe Lipstick in Vixen. This is a gorgeous plummy purple that is on the bright side but looks like it will be buildable for a deep colour. I have been searching for a deep plum for a while and this looks a tad light for what I was looking for, but I can't wait to wear it regardless. The formula seems creamy and doesn't smudge to much on the back of my hand so looks like it could be a winner. Let me know of you have tried BH Cosmetics and what you thought! Nicole xx 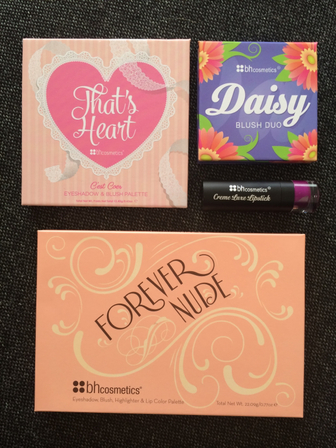
I haven't done many fashion related posts, buts it's something I really want to get in to! I have seen alot of styling videos and pictures everywhere of tartan. I love the way tartan looks and all the different colours it comes in. I love red though, especially when it comes to clothing I love the way any shade of red looks against my skin tone so it's something I always gravitate towards. So today I though I would write a post about the Tartan pieces I have and how I style them. 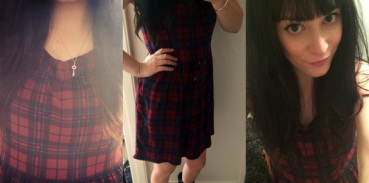 The first piece I've got is a tartan dress which was from Cotton On. This dress has a square neckline with little buttons on each shoulder for detail. It is a baby doll shape but shows the silhouette alot better. It hits a couple of inches above the knee so it's really easy to wear. It is sort of a faded looking red with a dark navy blue and black checkered pattern. In Winter I style this with my leather jacket, tights and my grungy looking boots (these are featured in my Top 5 Shoes post) I always wear my hair down and big and curly! If I want something a bit more casual I'll wear just a cardi, tights and plain ankle boots. In summer I'll wear it really casually with just either jandals or slip on shoes and probably no cardi. If it is a cooler day I think it would look great worn over top of a plain white tshirt. 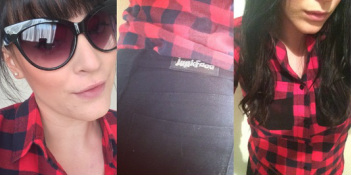 The second piece I have is a Tartan shirt I found at Temt. This is a basic shirt that tapers in slightly at the waist, has a high collar and rolled up sleeves. This has a black chiffon/polyester material for pockets and I wasn't sure about this when I brought it but now I quite like them! I love how vintage a tartan shirt is, so for Winter I love wearing this shirt with my hair up and some over sized cat eye glasses. I usually wear these with a plain pair of blue denim jeans. I recently got a pair of really high waisted black skinny jeans and I really like the way the shirt looks tucked into them. I have also worn it open over a plain black maxi for a more casual feel. In Summer I am going to style this shirt open, with a pair of cut off denim and white singlet. I definitely want to get a pair of high waisted black shorts so I can recreate my Winter look too. I think a shirt is such a staple piece in the wardrobe and I love the fun that the tartan brings. This shirt is also a pretty bright red which I absolutely love.
So these are the only pieces of tartan I have but I have to say I'm hooked!! I've seen a gorgeous bralet and kimono that I NEED but haven't quite yet justified ha ha. Let me know if you love Tartan like I do and how you style it. Nicole xx Today I thought I would do a review of the moisturiser I am using, this is the Elizabeth Arden Visible Difference for Combination Skin. I've been using this cream for a few months and have been really happy with it so I though I would let you all know exactly what I think about it. 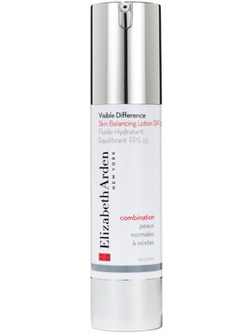 I first tried this range when I got a sample of the scrub and moisturiser from Farmers. I managed to use the little foil packet three times and really loved it. Since buying the full size moisturiser I've noticed great results with my skin, it's much softer and I find it's always hydrated without feeling greasy. It's light enough for me to put on before my primer and moisturising enough for me to apply at night after I take my make up off. It also smells amazing without being too over powering. To sum it up this moisturiser is amazing. For the amount of time a bottle lasts it's definitely value for money. It also comes in a formula for dry skin, normal skin and oily skin so there's an option for everyone. I've just purchased a kit that has the full skin care range so I'm interested to see what changes this will bring to my skin!
Nicole xx 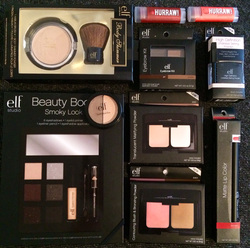 So late last week I ordered some ELF make up off an online website. I requested the faster shipping (as the cost wasn't too different from the slowest form of shipping) and was surprised when it showed up only 5 days later. I ended up getting 10 items for just under $40.00 and these were all products I have been dying to try for a long time so I've been pretty excited!! The products came really well packaged with not a single product damaged. I got a little excited when it first came (and before I'd had a chance to photograph it all!!) so please ignore any marks in the products, they all came smooth and clean. I am looking so forward to trying it all and reviewing it on here...but so far I am well impressed. 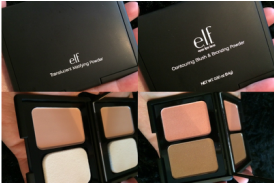 The first thing I opened was the Translucent Matifying Powder in Translucent. This is just a basic setting powder that is supposed to give a flawless matte finish. It comes in a sleek compact with the powder to one side and a small sponge to the other. It feels soft and silky and is a great colour. I got the Contouring Blush and Bronzing Powder in St Lucia, this I've heard it a great dupe for the Nars Laguna and Orgasm Duo so I can not wait to try this. The bronzer looks like its got a small amount of gold shimmer in it but when swatched it looks matte. It's a great golden tone too, not too orange. The blush is a soft peachy pink with a small amount of gold shimmer which does show up when swatched but not too strongly. Just a nice soft everyday blush. 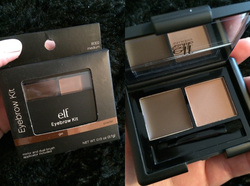 I got the extremely popular Eyebrow kit that Youtuber Shaaanxo uses all the time (which is the reason why it has become so popular) I got it in the shade Medium and in the pan it looks quite light but when swatched it looks like it'll be a great colour. In the pan it has a setting gel, which is the dark brown side and the eyebrow powder. The gel looks really dark but is quite a sheer colour and will add a small amount of tint when used. It also comes with a small brush that has a fluffy end and a tapered end. The fluffy end doesn't look practical at all but the tapered end looks quite useable. 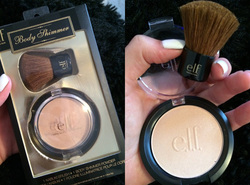 I've been after a Kabuki brush for a while and I saw this little kit, a kabuki brush on its own was double the price so I thought I'd give the kit a go. This kit comes with a Healthy Glow Shimmer Powder and the brush. The shimmer is actually a gorgeous golden shimmer with small sand gold and copper looking flecks. This blends out really well and looks like it would be a great highlight. The brush however is tiny, I should have realized this before I got it but I still think i can make it work. Its perfectly dense and extremely soft so would be good for setting under eye powder if not the whole face. 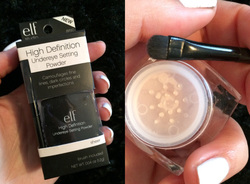 I got another product made popular by Youtuber Shaaanxo, this is the HD Undereye Setting Powder in Sheer. This product claims to camouflage fine lines, dark circles and imperfections, and is supposed to be perfect for setting cream concealer. The packaging is very sleek and light weight and the powder is self feels soft and silky. There is a pretty good amount of product too considering the amount you actually need to use. It also comes with a brush which is more like an eyeshadow brush and quite stiff. This wouldn't be ideal for the setting powder but could work for a concealer brush or an eyeshadow brush. 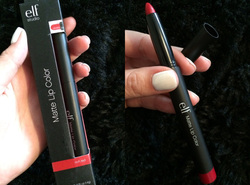 Next is probably my favourite product! This is the Matte Lip Colour in Rich Red, I've been after a good red matte lip product for a while and this is gorgeous. It comes in pen form and is a simple wind up. There is actually a good amount of product there too which is surprising. The colour is a deep red which doesn't lean too much toward being blue based or orange based so would be easy to wear on most skin tones. I did swatch this on the back of my hand and its creamy and soft and extremely pigmented. I can't wait to try this on my lips and see what its staying power is like. I've got a feeling I'm going to love it!  Next is an Eyeshadow Duo in Butter Pecan. The container for this is really sturdy and I think it will be great for travelling. The two colours are a soft champagne and what looks like a mid toned brown, they are also both shimmer. When swatched the champagne colour is gorgeous and looks just like it does in the pan, a perfect all over colour. The brown however is much different, it swatched almost like a copper brown. This colour is AMAZING and will be perfect on blue or green eyes. It has a nice amount of shimmer and I think it would be good for day and night. 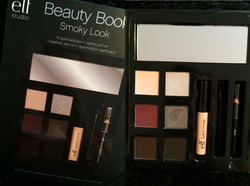 The last thing I'm going to talk about is the Beauty Book in Smoky Look. As the name would suggest this product comes in a book form and is actually great value for the price (around $5.00) on the inside it has a little instruction guide on how to create a day and night look. The book comes with 6 eyeshadows, 3 matte day shades and 3 shimmer evening shades. It also comes with an eyeshadow primer, a Black eyeliner and a brush. This set comes with a great selection of colours, however some of the shimmers and quite chalky but nothing that can't be fixed with a little primer. All in all this is a great little kit and I'm sure I'll get plenty of use out of it.
I also got two Hurraw Lip Balms but I am going to do a seperate blog post about them and review them on their own, so keep an eye out for that! These products are all really great value for the price, they are the perfect beginner products and so far I'm really liking what I've got. I also have a discount code so if anyone wants to make an order just comment below and I'll give it to you. Nicole xx I am going to start reviewing some of the new products that I am buying as well as doing Make Up Hauls on here. I have been on the hunt lately for a new under eye concealer as my current one has Acne healing properties in it and I just think that is too harsh for the under eye area. Enter Loreal Magic Lumi!! 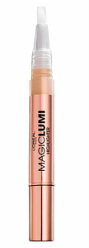 So this Concealer is supposed to be more a highlight and light concealer combo and for this reason I think it works really well on the under eye area. It is a light formula and barely detectable on the skin. It comes in a gorgeous Rose Gold looking pen and all you have to do is twist the bottom and the product comes up through the little brush at the top, I then go and blend out with my fingers as I like the soft result this gives. When I first used it I literally had to pump it like twenty times to get it started but I now find that around five pumps will do both under eye areas. This concealer comes in a variety of shades and I have mine in light, I find that if I go a shade lighter with my concealer it really highlights and brightens my under eye area. I originally went to buy this product instore but found it was around $30.00 (NZ make up products are insanely priced!!) but with a little research I managed to find it on another NZ website for $11.95. I like the formula and texture and I find it wears really well throughout the day. I did try it on blemishes and found it didn't really provide enough coverage, so I wouldn't recommend it for that. I think for women who are only dealing with a small amount of fine lines this is perfect as it didn't fall into my lines at all, I do set it immediately with a setting powder though so either way I am avoiding the creasing problem. I've seen a few negative reviews on this product and I can't work out why. This product does everything it claims to do so you can't really expect much more! I have attached a photo of me wearing it below so you can get an idea of just how flawless it is. I also have some great reviews coming up including MAC Lipsticks and Foundation, a wide range of ELF make up, Hurraw Lip Balms and some Elizabeth Arden skin care so keep an eye out for all that! Nicole xx 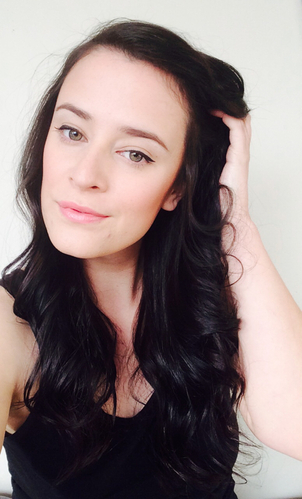
|
Fashion, Beauty and MeAn insight into the life of a Hairdresser, Make Up Artist and Fashion Junkie  Categories
All
Archives
September 2016
|

 RSS Feed
