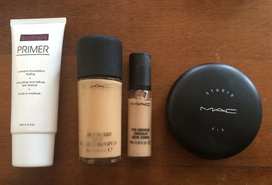
 So today I wanted to do a little Make Up post. For the past few weeks I've had pretty bad skin, so I've come up with a routine to completely hide it without the skin looking too cakey. The products I use are: Australis Primer, MAC Studio Fix Foundation in NC20, MAC Prolongwear in NC15 and MAC Studio Fix Powder in NW20. When my skin is bad I always make sure I start with a really clean base and fresh brushes, to do this I use my Estee Lauder Cleanser, Toner and Moisturiser (I have a past post about these that I can link below if anyone wants to see it). I then apply the Primer, concentrating mainly on the bad areas and blending out to the rest of my face. I then let it sink in completely..this can take up to 5 minutes. 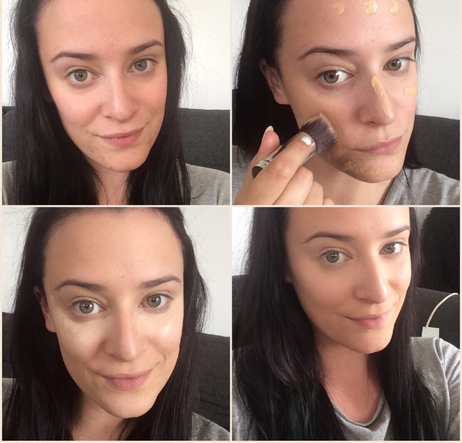 Then, using clean hands, I use the tip of my finger to dot some foundation all over my face straight from the bottle. I then use my clean flat top brush and blend it all in. I find that the more I blend Studio Fix foundation the more flawless it looks so take some time really blending it. I then apply a small amount of concealer (you will only need about half a pump of this one) to the back of my hand and using a pointed face brush (you could also use a beauty blender but I find if my skin is really bad the pointed face brush better) I blend it all out. I also apply it under my eyes in a triangle shape and blend out towards my hair line. If my skin is still not completely covered (it generally is but if I am going somewhere where photos will be taken I usually do this next step) I apply a tiny amount of my foundation to the bad areas and blend out. For some reason layering in this way doesn't leave a cakey finish. I then apply my Studio Fix Powder all over my face and it's set! I find this will last an entire day at work and makes my skin look flawless.
What products to you use for those terrible skin days? Nicole xx
1 Comment
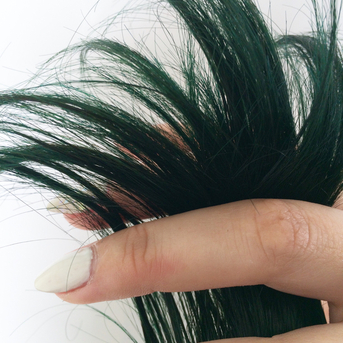
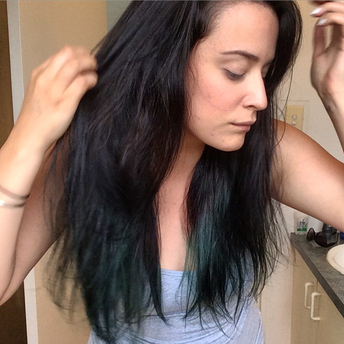
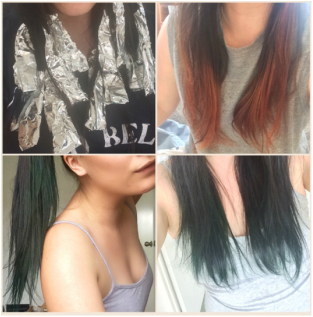 I was in one of those moods where I really need a change. A couple of months ago I decided to buy the La Riche Directions Semi Permanent colour in Alpine Green. Ever since Kylie Jenner had her green dip dye, I've been obsessed. I did a lot of research on this hair colour and for the price it sounds perfect (I will review it properly in the coming weeks). The first thing I did was use some supermarket bleach and strip the ends. As my hair is so dark and has been coloured a few times already it only really lifts down to and orangey gold. However this is perfect for a Forrest green. I wrapped all the individual sections in tin foil to make sure I didn't make a mess while processing too. Once developed I let it dry completely, I then started at the bottom and dyed my roots and mid lengths with a dark brown, I wanted to refresh the base colour of my hair to make the green really pop. I then applied the green to the lightened hair section by section until all my hair was done. I then carefully rinsed the base colour then took out the foils and rinsed the green. I then applied a treatment and let it air dry. I haven't properly styles my hair yet as I wanted to give it a break (this also gives an idea in the photos just how dead straight my hair is!) but I love the colour! In real life it's vibrant in the light but blends in quite well in normal light. I think as I wash it, the colour will become more vibrant as it gives which I'm looking forward to! It definitely makes me think about dying the whole thing Forrest green! It's surprisingly more subtle then you would think..in natural lighting anyway! Let me know if you like the new hair and I'll do an updated post with a full review of the product I used after I've washed and styled it a few times Nicole x
|
Fashion, Beauty and MeAn insight into the life of a Hairdresser, Make Up Artist and Fashion Junkie  Categories
All
Archives
September 2016
|
 RSS Feed
