|
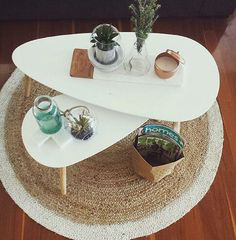
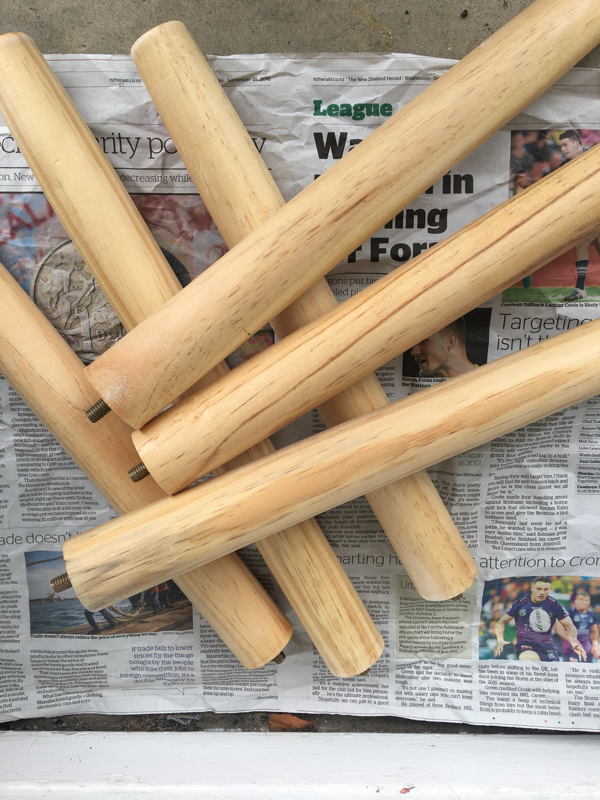
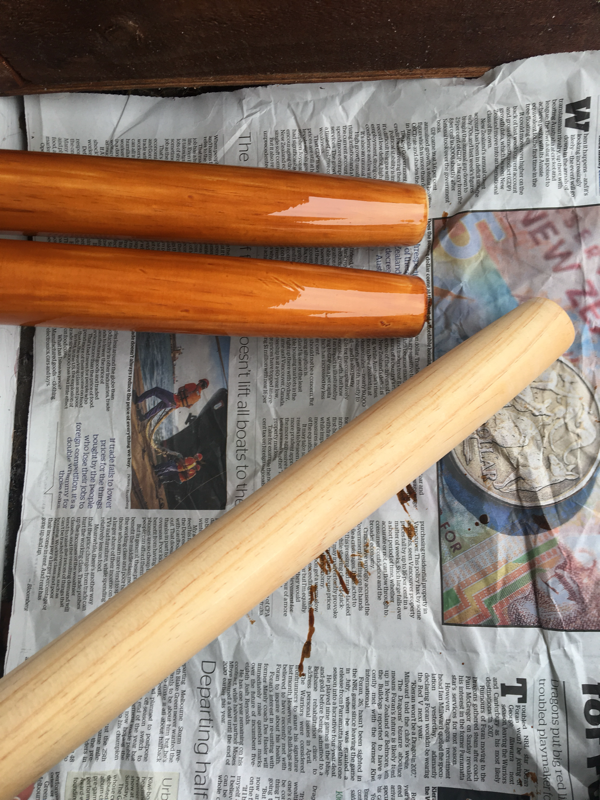
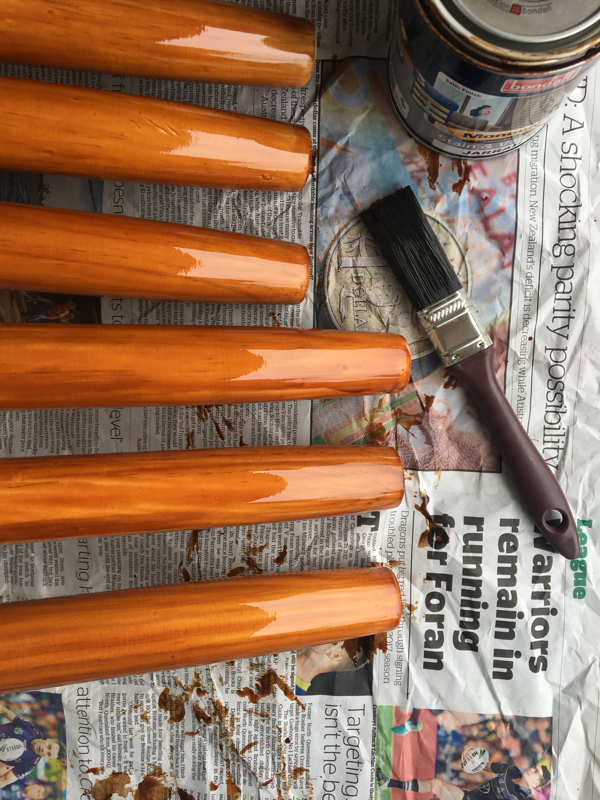
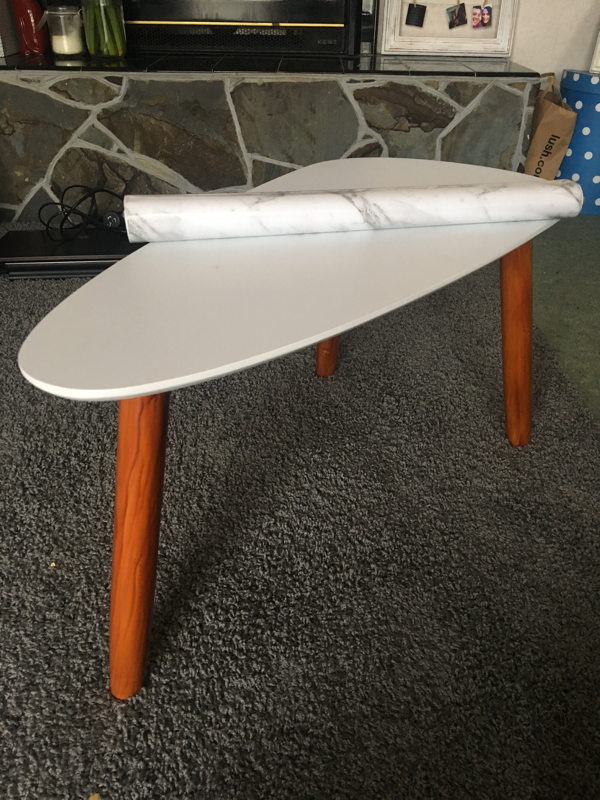
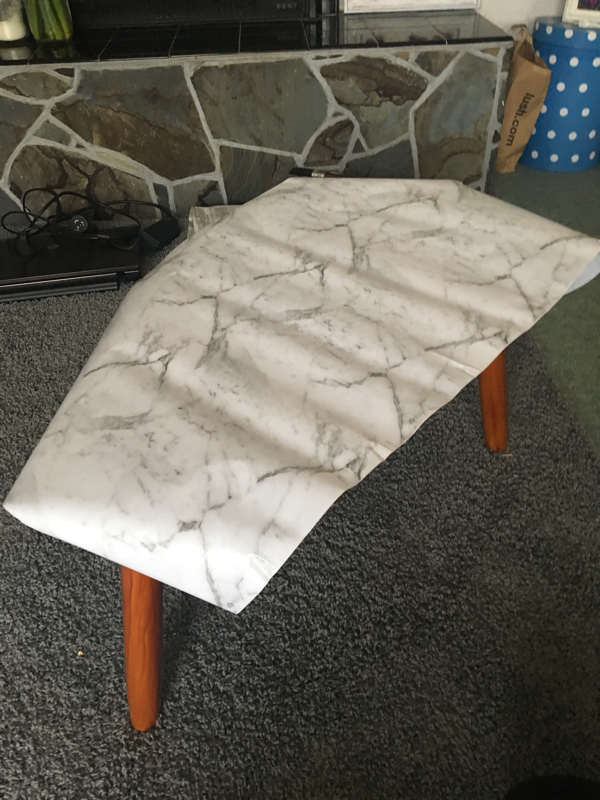
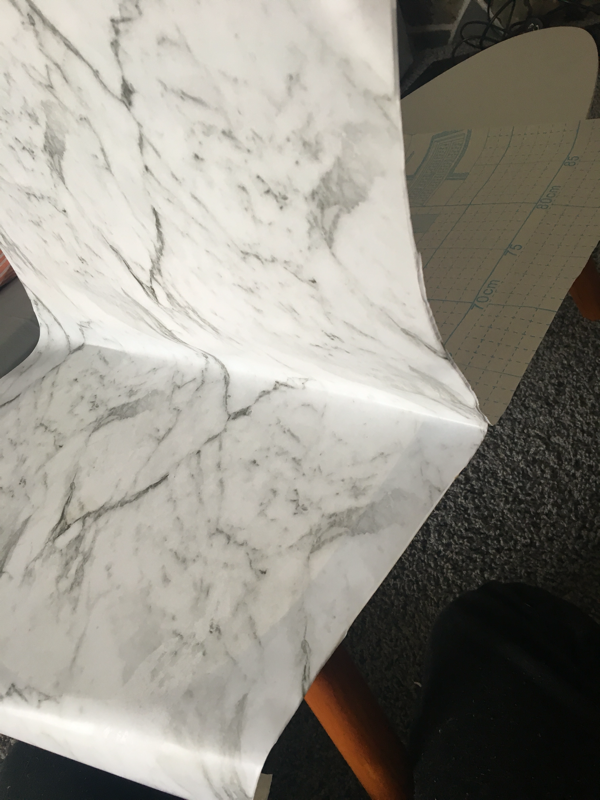
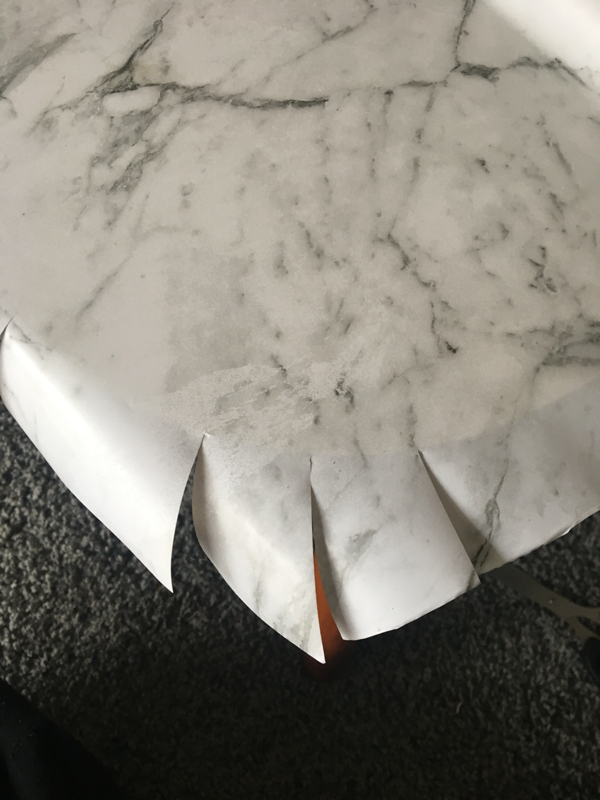
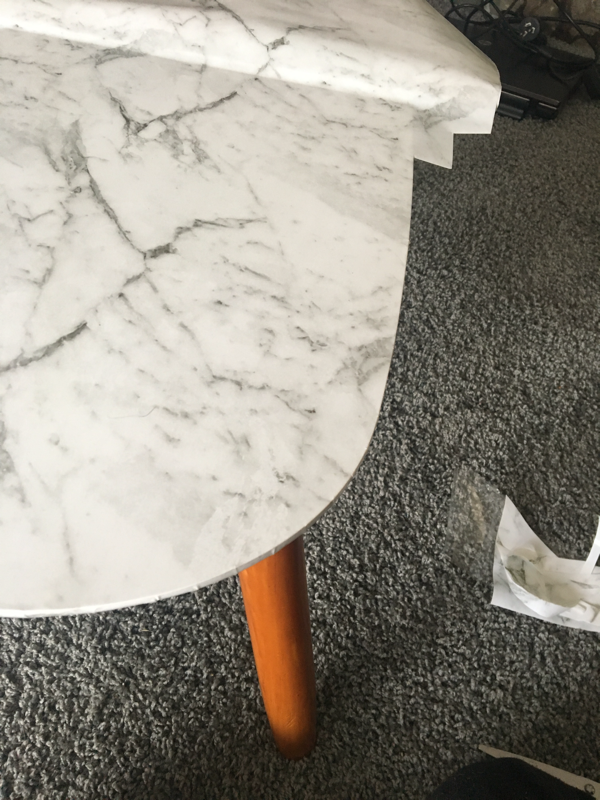
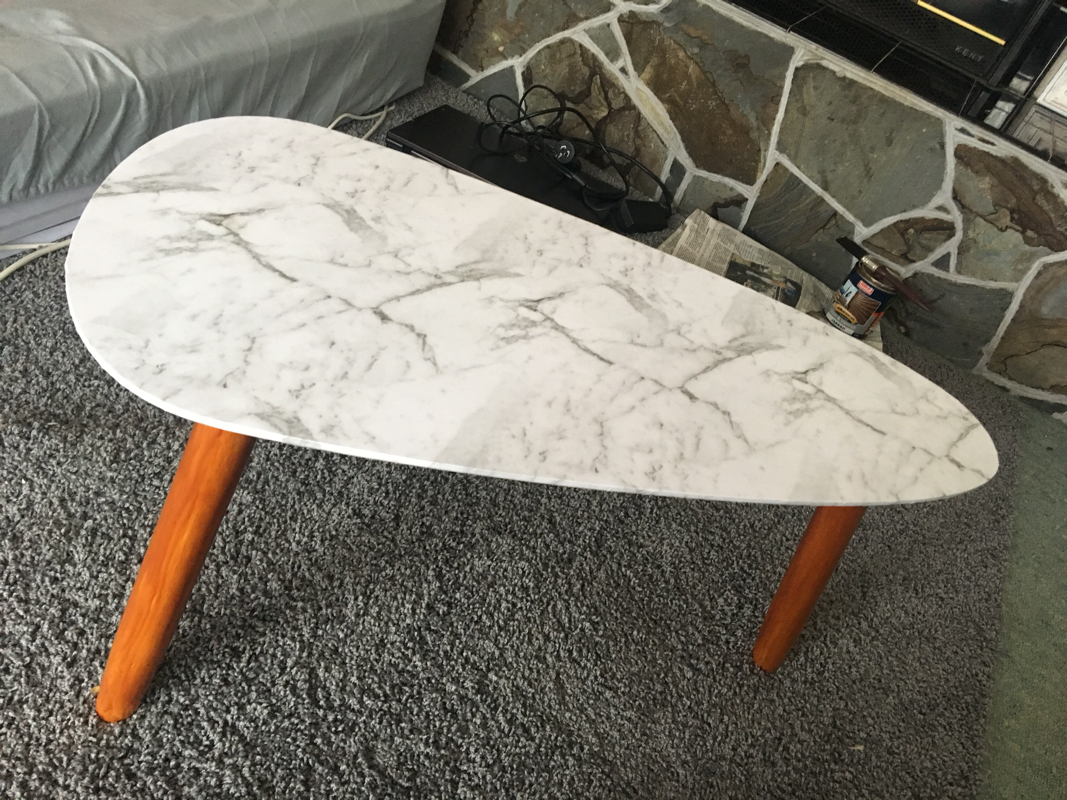
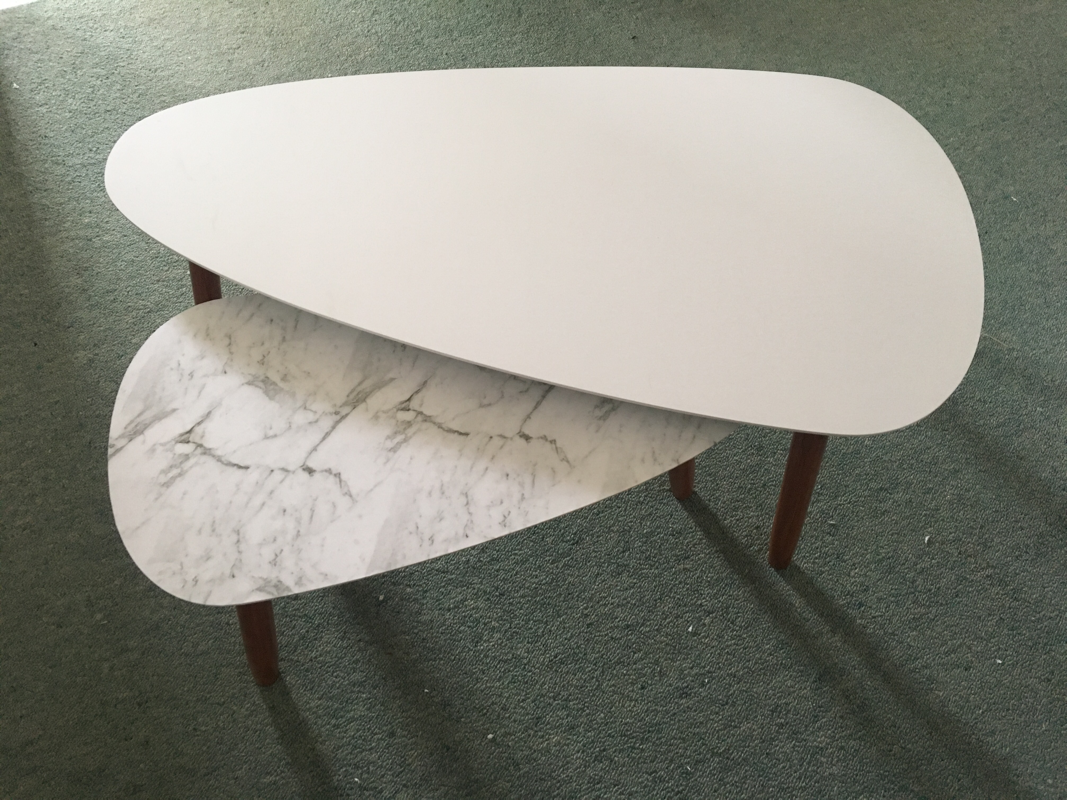
I have to say firstly, that this months DIY is my personal favourite (well so far!) I just LOVE how it turned out. Lately I have been loving doing small homeware DIY's. I love the way something so inexpensive can be made to look amazing..and at a fraction of the price it would cost for an luxury piece of furniture. 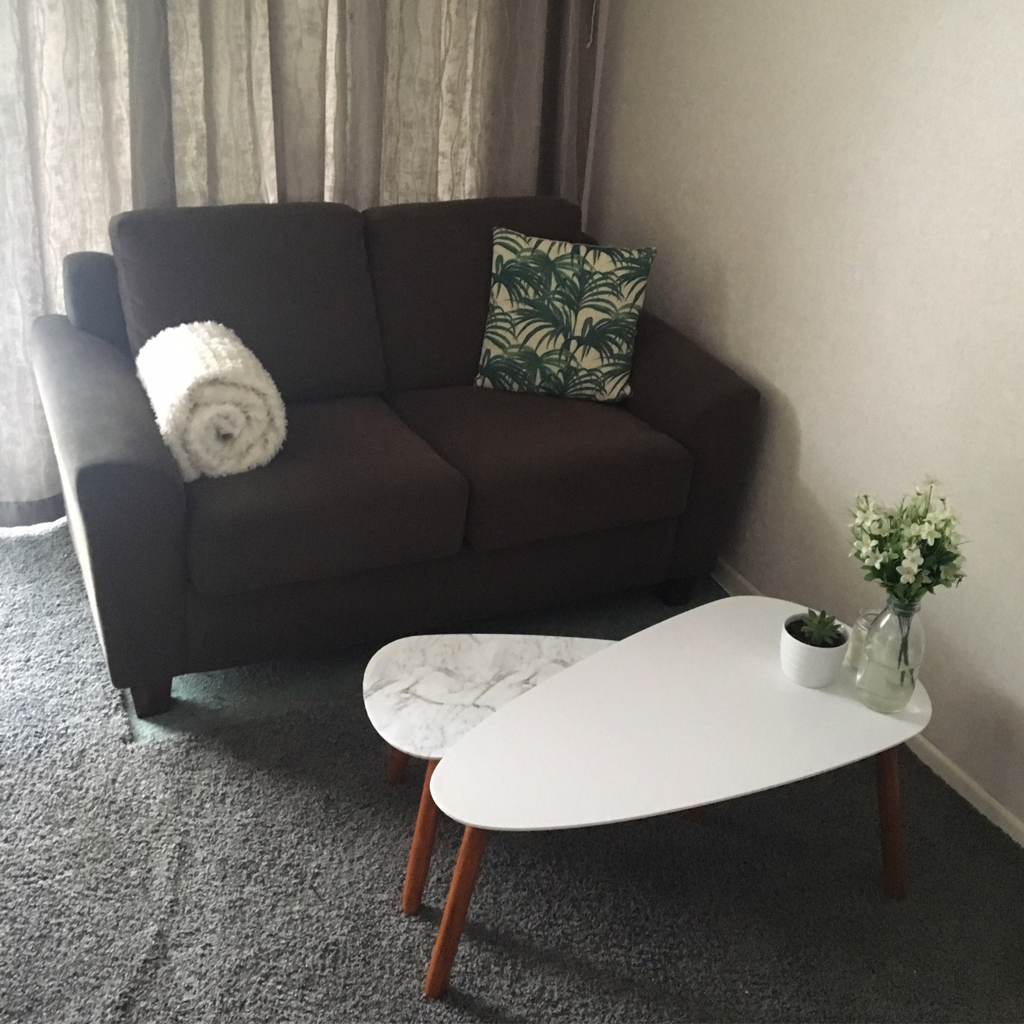 So this months DIY is my Kmart Hack coffee tables!! These inexpensive tables we're brought, as a set, from Kmart for around $40. However all of the furniture in my lounge is currently a dark varnished wood, so as much as I loved the tables..they would need to be upgraded to suit my decor. I also felt that have two white tables was a little bit much for the room, I wanted to break it up a little bit. I think the small table in the marble print is absolutely perfect. 1. Here is a before picture of the tables, I didn't take my own picture so this is one that came up on Google, it gives you a good idea of the changes made. 2. The first thing I did was sand the legs. These legs are real wood (which was what sold the set to me!) so I lightly sanded them to take off the outer coating that they put on, this also helps the varnish to adhere to the wood. 3. This photo was really just to show the drastic colour different between the varnished legs and the original legs. The varnished colour is the same colour I've used on all the furniture in my living areas..so it really does match everything perfectly! 4. Once I had finished varnishing all the legs, I let them dry 5. Next I got this gorgeous Marble Contact Paper, I picked this up from Kmart for around $6.00 and it had around 2m on it. This contact paper is amazing! It looks so realistic and it's one of the cheapest I've seen 6. Next I measured out the contact paper, I already knew the paper was wide enough so I cut enough for the length with around 5cm over hang 7. Next I slowly pealed back around 1/3 of the length of the contact paper and applied it to the table..ensuring there were no bubbles. I used a spatula to help flatten it out but you can find soft scrapers at the hardware store that would do a much better job 8. Next I cut slits around the edge of the corners of the table toward the edge of the table, so that I could wrap it under the edge as seamlessly as possible. I actually ended up having many cuts between each of these as it proved to be pretty difficult getting it flat..but you'll see a close up of that very soon! 9. Here is an up close photo of the edging, I know it's not perfect but unless you look close..I think it looks pretty good! 10. I probably should have stuck the contact paper to the table first then gone around and finished the edging..but I wasn't sure the edging would sit flat so I wanted to do a small area to test it, hence why there's a section completely done..and a section not even stuck to the table! So basically from here I went around and did what I had just done to the rest of the table. 11. Here is a close up of the table on its own, with the varnished legs back on and that gorgeous marble top! 12. And finally here are the two tables together. I think they look amazing! 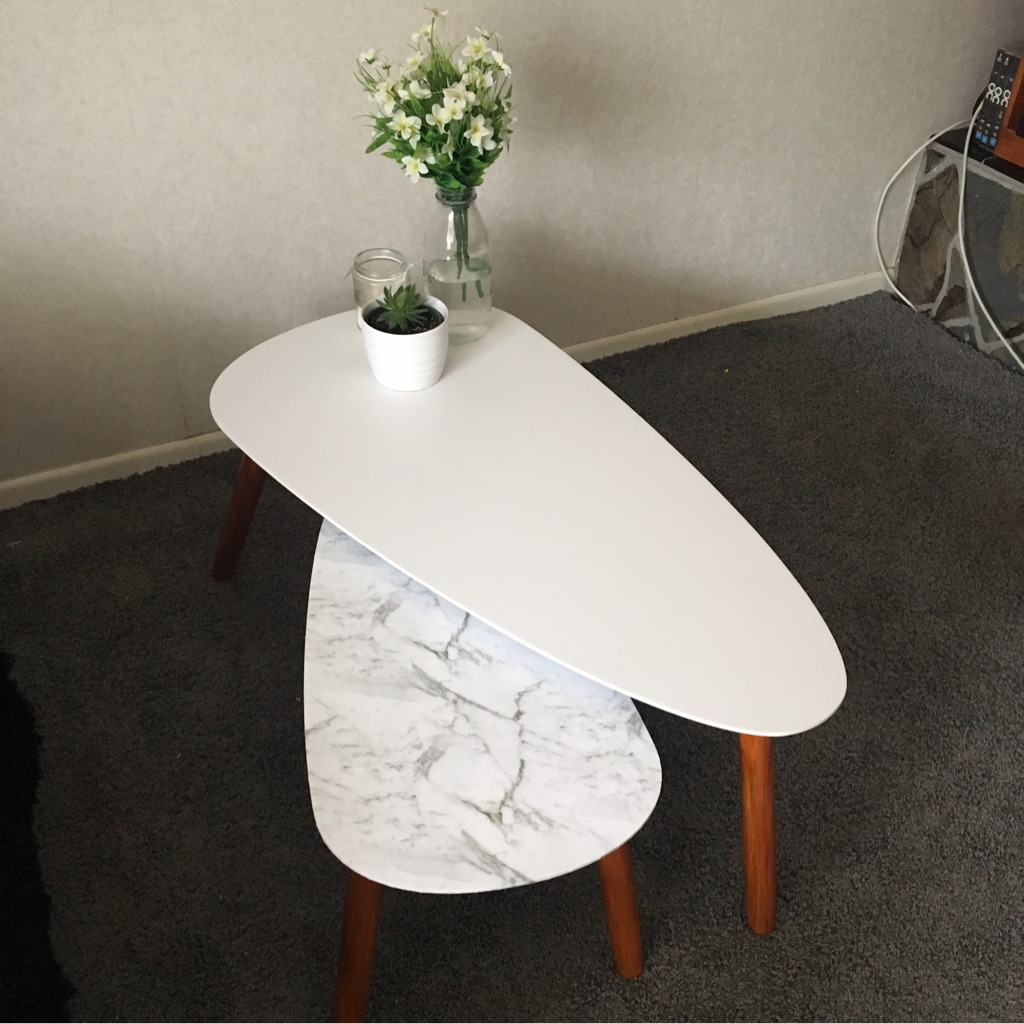 I am so happy with how these tables turned out!! I absolutely love them with a little succulent and candle on top. They are so simple but make a real statement in our living room.
I hope this has given you a little DIY inspiration, I have a couple more marble DIY's coming so keep a look out Nicole xx
0 Comments
So I have been looking at BH Cosmetics for a long time now so I decided to grab a few bits and pieces to try and review! 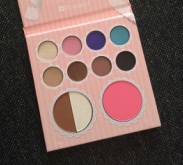 The first thing I got is the one I was most excited about, the BH Cosmetics That's Heart Palette. This gorgeous palette was developed with Youtuber Heart D from her channel That's Heart. Firstly the packaging is beautiful. This is one thing that definitely caught my eye. This palette contains 8 eyeshadows, a blush, and Bronzer and highlight. The Bronzer, blush and highlight all look to be beautiful colours. The eyeshadows are all shimmers, but not heavy glittery ones. There is a good range of colours which include some gorgeous brights! I'll be doing a How To and Review of this so stay tuned for that!  I've been wanting the Naked Palette forever so as a substitute I decided to try the BH Forever Nude Palette. This palette has 6 eyeshadows, a highlight, blush, bronzer and 2 lipsticks. The Bronzer is quite light but the blush is a peachy pinky. The eyeshadows are basically all shimmers and are in varying shades of pink/purple and bronze/gold. They would definitely create some gorgeous day time looks and I can't wait to play! The lipsticks come in a neutral peach nude and a mid tones neutral pink. The downside of this palette is that the packaging is plastic and cheap looking. It looks like it could be a child's play palette so it's a little disappointing but I look forward to trying the products. 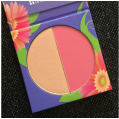 I also grabbed one of the blush duos in Daisy. This duo has a highlight and blush and looks so stunning. The blush is a peachy pink and looks like it will create a soft flushed look and the highlights a golden/yellow tone which I think will be amazing on yellow based skin tones. The packaging of this is so beautiful, it's a soft lilac with multi coloured daisies all over it and I love it! 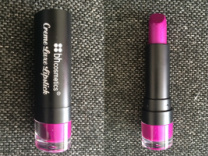 The last thing I got was a lipstick. This is the BH Cosmetics Creme Luxe Lipstick in Vixen. This is a gorgeous plummy purple that is on the bright side but looks like it will be buildable for a deep colour. I have been searching for a deep plum for a while and this looks a tad light for what I was looking for, but I can't wait to wear it regardless. The formula seems creamy and doesn't smudge to much on the back of my hand so looks like it could be a winner. Let me know of you have tried BH Cosmetics and what you thought! Nicole xx 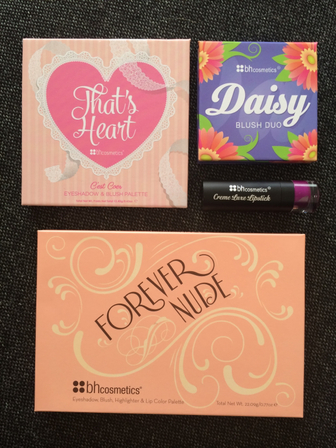
|
Fashion, Beauty and MeAn insight into the life of a Hairdresser, Make Up Artist and Fashion Junkie  Categories
All
Archives
September 2016
|

 RSS Feed
